
Some of the links on this page may be affiliate links. Click here to learn more.
When I first began potting my orchids, I struggled to find the right balance between allowing airflow to the roots, while at the same time providing the roots with enough water. After potting orchids for many years, I’ve come up with a go-to potting kit that helps me successfully pot my orchids – one that balances oxygen, water, and drainage.
I’m really happy with my potting kit. It basically consists of:
- rePotme Orchid Potting Mixes. What makes rePotme remarkable is their selection of potting mixes and orchid products that emphasize freshness, quality ingredients, and value.
- Rock Wool for added moisture. Use rock wool only if the orchid’s roots require more moisture.
- These The Koshiji Petit Cut Hand Pruning Shears fit nicely in my hands, make cleaning up orchid roots a cinch.
- This butane kitchen torch is easy to use and sanitizes the shears to prevent disease from spreading between orchids.
- Rhizome clips are also helpful to keep your orchid in place while new roots develop.
- A right pot is the final ingredient to potting orchids. Use a plastic pot for added moisture and a terracotta pot to reduce moisture.
This is my basic potting kit, and I’m really happy with it, but I’ll give you a list of different products that will help you fine-tune potting based on your orchids and growing environment. Some orchids do not have water storage and need a slightly damp potting mix. Other orchids need their roots to dry out between watering. Likewise, some climates have high levels of humidity, while other climates are dry, with very little humidity.
Essential Potting Kit
No matter your climate or orchid, these tools are must-haves for every orchid enthusiast who plans to re-pot their orchids.
Koshiji Petit Cut Hand Pruning Shears
No matter where you live, sanitation is top-priority, so I recommend everyone invests in a good pair of Koshiji Petit Cut Hand Pruning Shears and a butane torch to keep them clean. These pruners are the BEST! I use them all the time. They are sharp and cut cleanly every time.
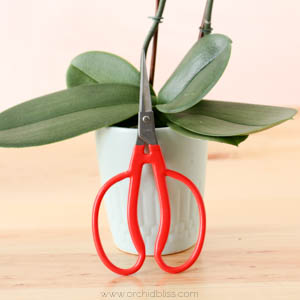
These pruners feel just right in your hand (right or left). I use them when potting, to clean away dead roots, trimming flower spikes, and for cutting away dead leaves. You can check out my favorite pruning shears on Amazon.
Butane Kitchen Torch
A kitchen torch may be the last thing you expect to see on this resource page. This torch is a fast and effective way to sterilize your pruning shears.
Before and after using my pruning shears, I pass the tips of the shears through the flame to keep from passing pathogens between orchids. The butane kitchen torch is available at Amazon.
Orchid Potting Mixes
At rePotme, you can find a diverse range of orchid mixes tailored to your specific needs, including options for Phalaenopsis, Oncidium, Cattleya, Dendrobium, Paphiopedilum, Phragmipedium, Cymbidium, Jewel orchids, as well as an all-purpose mix.
rePotme hand blends orchid and potting mixes daily in small batches using top-quality ingredients. They believe that a one-size-fits-all approach doesn’t work for orchids and other fine plants, so they strive to provide the highest quality orchid mixes tailored to individual growing conditions.
To maintain the unique characteristics of each ingredient, they use traditional hand blending techniques, treating the medium gently. The mixes are freshly blended and packaged just hours or days before being shipped to ensure freshness.
Their commitment to quality means that once customers try their orchid mixes made from premium ingredients, they won’t want to return to inferior ones available in stores. Click here to go to rePotme.
Rhizome Clips
Lastly, the orchid can sit pretty loosely in the pot after potting. It doesn’t take much for a newly potted orchid to become “unpotted.” To keep the orchid secure in the pot while new roots develop, you can use rhizome clips. These clips, available on Amazon, snap to the pot’s side and hold the orchid in place.
Fine-Tune Potting Kit For Added Moisture
Neither Paphiopedilum nor phalaenopsis orchids have water storage and need a little extra moisture – especially if you live in a dry climate. Two things you can do to add moisture to the roots while still maintaining a free-draining potting mix is to add wool rock to the fir bark potting mix and to use a plastic pot.
Rock Wool
I’ve found that because the air where I live is so dry, my orchids benefit from adding a few cubes of rock wool to the potting mix. Because rock wool is highly absorbent, it provides additional water to the well-draining mix. The rock wool I like to use are these on Amazon.
Plastic Pot
Next is the pot. The pot you choose will either hold moisture – or wick moisture. To increase water retention, choose a plastic pot with slits for drainage. In addition to retaining a bit of water, clear plastic pots provide an unobstructed view of the roots. You will also be able to observe condensation of the pot’s side. If you see condensation, you know the potting media is still wet, providing moisture to the roots. These pots can be a lifesaver when watering your orchids.
I like these clear plastic pots on Amazon because the plastic is strong and durable and can be reused. Made of durable plastic. No flimsy sides here. With lots of drainage holes, these pots allow plenty of airflow and water drainage.
For added stability, place the plastic pot inside a heavier clay pot. This will keep your orchid from toppling over.
Fine-Tune Potting Kit For Optimal Water Drainage
Because many orchids have water storage in the form of pseudobulbs, they like their roots to dry out between watering. Humid climates provide necessary water to the orchid’s leaves and also keep the potting mix damper longer. If this is your orchid’s situation, don’t use wool rock and consider using terracotta pots.
Terracotta Pot
Now for the pot. If you live in a humid climate, you need a pot that will wick moisture away from the roots so the roots don’t sit in water. Terracotta pots are a perfect fit as terracotta absorbs moisture, wicking excess water away from the roots. Additionally, terra cotta is stable and will help keep your orchid from falling over. When selecting a terracotta pot, ensure a drainage hole in the bottom.
Even though terracotta is opaque, and you won’t see the roots or the potting media, you can heft the pot. Terra cotta will be heavier after watering and lighter a few days later. Lift your pot following watering and a few days later to help you get the feel of a well-watered terracotta pot – and one that’s dry.
I recommend buying terracotta pots locally rather than online. Terracotta is cheap but heavy, so you’ll pay high shipping costs if you pay to have one delivered. Look at any garden nursery for terracotta pots.