
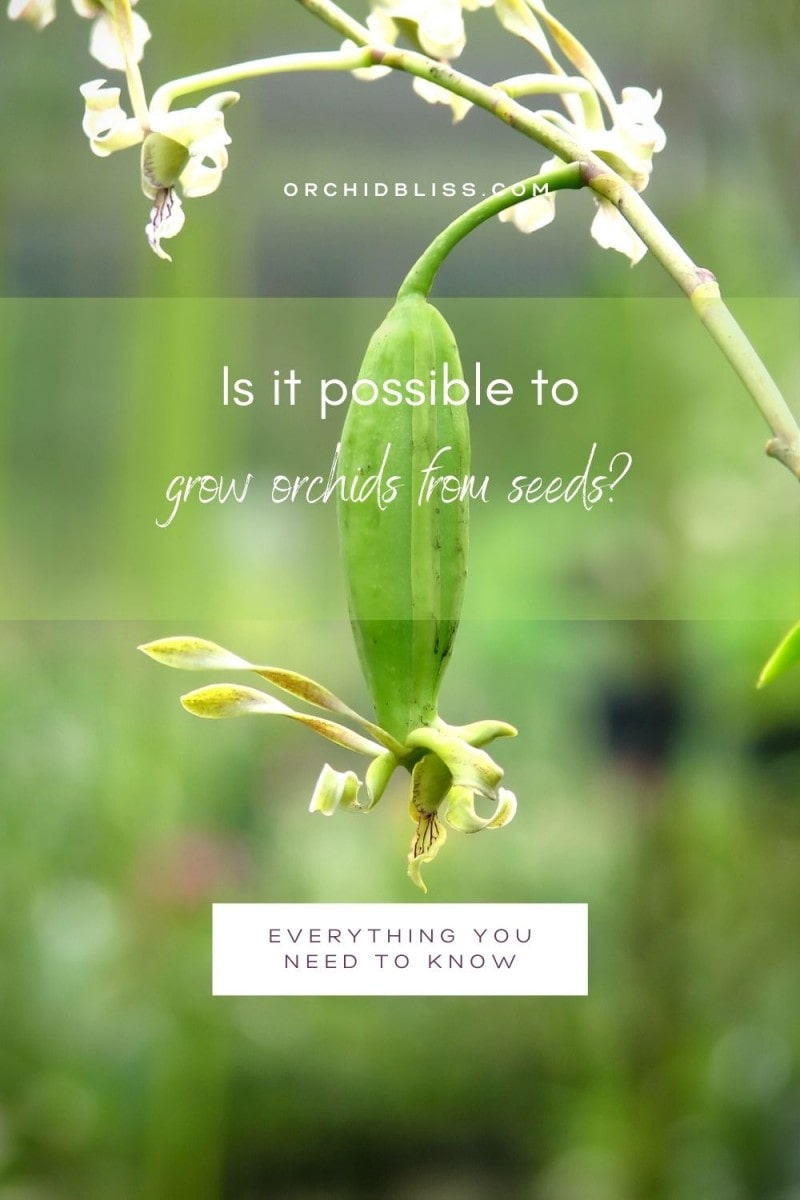
Orchids are beautiful and valuable. Most cultivated orchids are native to tropical and subtropical, and cloud-forest climates but occur worldwide. As valuable plants, you can propagate orchids through division or from seeds and cuttings.
To grow orchids from seeds, you need a highly sterile environment and a source for orchid seeds. You’ll also need to clean the seeds and a place to store them. Prepare an agar medium where you will sow the seeds. After germination, deflask and transfer the plants into pots.
Growing orchids from seeds is a delicate procedure that needs a highly sterile environment (hence, most seed growers work from a laboratory). Even so, in this guide, you’ll learn how to grow orchids from seeds at home.
Some of the links on this page may be affiliate links. Click here to learn more.
Ways to Germinate an Orchid Seed
Let’s first begin by understanding the germination process of orchids.
Symbiotic Germination
There are two ways to germinate an orchid seed. In nature, orchid seeds drop down to the soil. However, unlike other plant seeds, orchid seeds don’t store nutrients and can’t survive and grow without an external source of nutrients. To compensate for their lack of nutrient stores, orchid seeds form symbiotic relationships with fungi.
Mycorrhizal fungi in the soil have an enhanced ability to absorb nutrients. The fungi attach to orchid seeds and promote germination. In return, the growing orchid uses photosynthesis to make food from the nutrients.
What happens in nature is that the seed lands on the soil and is attacked by fungi. In some cases, the fungi will decompose the seed until the seed dies. In other cases, the seed will feed off the fungi’s nutrients until the fungi die. Then, the seed dies shortly afterward for a lack of further nutrients. In other cases, the seed denies the fungi entrance, so the seed dies.
However, in a small fraction of cases, the fungus attacks, and at the same time, the seed degrades and consumes the fungi. The symbiotic relationship flourishes and an orchid plant emerges.
Symbiotic germination in laboratories mimics what happens in nature. Symbiotic germination is a complex process done by highly trained botanists in specialist labs. This guide will focus on asymbiotic germination, which can be done at home.
Asymbiotic Germination (Flasking)
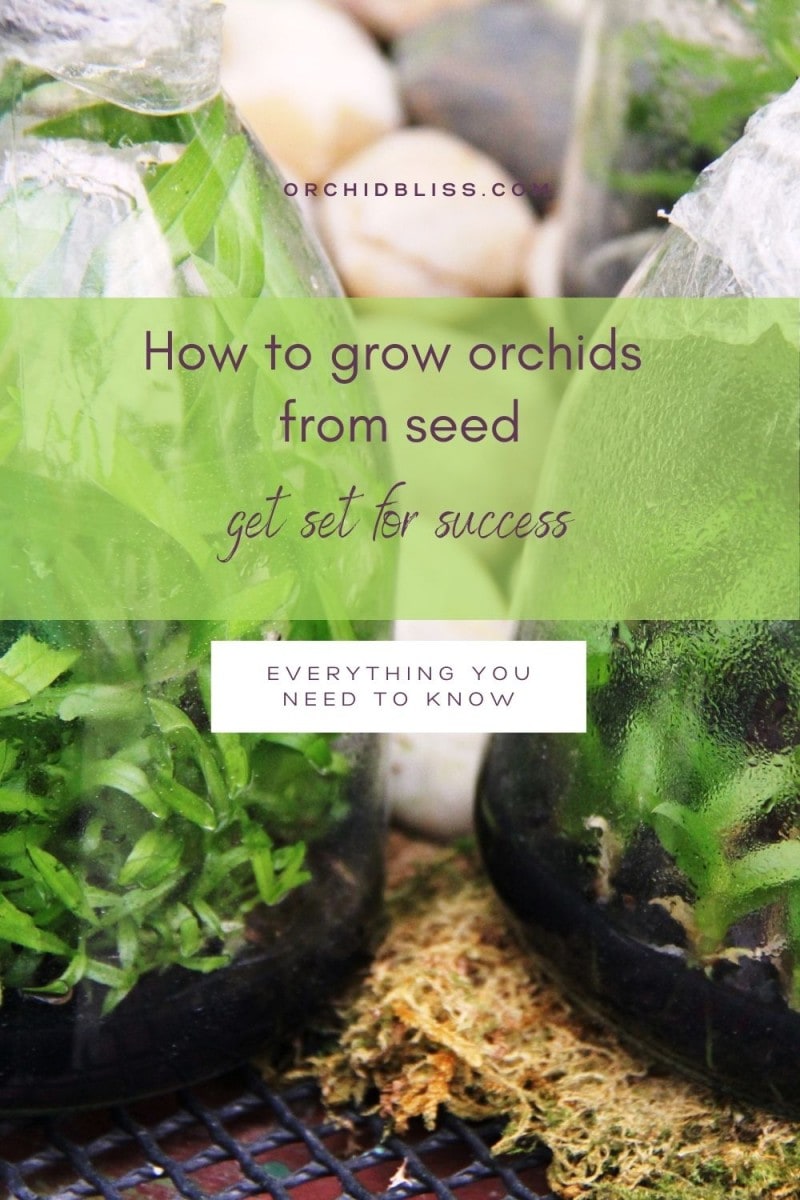
Flasking involves germinating orchid seeds in vitro using agar. The agar is a jelly-like mixture of nutrients and growth hormones. Flasking is the more popular method of growing orchids from seeds at home since it is cheaper, easier, quicker, and more reliable.
Gather the Things You Need to Grow Your Orchids
There are very specific things you need to grow orchids from seed. These include:
- Unripe orchid seed pods
- Distilled water (local grocery store)
- Cooking pot
- Rubber gloves
- 80% alcohol
- Bleach for sterilization
- A designated room
- Glove box (sterile environment)
- Scalpel
- A beaker to sow your seeds in
- Some tinfoil to sterilize the edges
- 10-inch (25.4-cm) tweezers
- Clean syringes
- Eyedropper
- Agar media (starter and maintenance)
- Orchid fertilizer
Have the Ideal Environment to Grow Orchids
As we’ve already mentioned, growing orchids from seeds is quite a delicate process; hence the environment to grow these seeds need to be right. Consider the following:
- Temperature: Minimum of 10°C (50°F) and a maximum of 30°C (86°F).
- Light: Some types need more sunlight than others. Filtered sunlight is best for most types.
- Water: Good drainage. Some need more moisture than others. Rainwater is best.
- Humidity: Tropical environment is best.
- Food: If you overfeed, you will kill them.
- Air circulation: Fresh moving air but not strong winds.
Get the Orchid Seeds
The seeds of an orchid are so minute. Consider this, the weight of an aspirin tablet is 500,000 times more than that of a single orchid seed. An orchid seed pod can contain anywhere from a thousand seeds to three million seeds.
The seeds are that small to enable long-distance dispersal and blow up high into the trees when it’s windy. This small size complicates the sourcing of orchid seeds.
Also, orchid seeds are highly susceptible to infections. Bacteria and fungi can ruin the seeds, so if handled poorly, the seeds won’t grow. For this reason, avoid buying from inexperienced botanists.
Don’t buy your seeds through sites like eBay and Etsy. Buy from orchid farmers whom you know or who have a reputation in orchid propagation. Still, the best way to source seeds with a high possibility of successful germination is to harvest from an orchid plant that split but still has thick walls.
To harvest the seeds, follow these steps:
- Put the seed capsules inside a clean empty bottle.
- Add some bleach into the bottle, shake a little, and let it sit for the next 15 minutes.
- Using tweezers, remove the seed capsules and place them on top of a paper towel.
- Sterilize the tweezers and scalpel.
- Use the scalpel to cut open the capsule and scrape off the seeds into a small bottle.
Clean and Store the Orchid Seeds
Once you have bought your seeds, you will need to clean them. Orchid seeds are tiny specks of dust, so ensure there’s no moving air that can blow away your seeds. Use a sterilized scalpel to cut open the pod and scrape out the seeds.
Use 3% hydrogen peroxide to clean your seeds. Add the hydrogen peroxide to the seeds in small flasks. Transfer to a small bottle, then close the lid and shake well. Let the mixture rest. A few hours after exposure to light, the hydrogen peroxide will decompose to form oxygen and water.
Store your clean orchid seeds in a small secure container such as a 3ml (0.1oz) Eppendorf tube. Store in a dry, cool place away from light. Don’t store in the fridge as this might cause moisture to condense and encourage mold growth.
While you can store the seeds for months, even years, using them immediately increases the chances of successful germination. To keep the seed dry, bury the Eppendorf tube inside a tub of oven-dried rice.
Prepare Your Agar Medium
Orchid agar is the key to successful germination. A good agar will likely have the following ingredients:
- Calcium nitrate
- Monopotassium dihydrogen phosphate
- Magnesium sulfate
- Ammonium sulfate
- Ferrous sulfate
- Manganese sulfate
- Saccharose
- Agar
- Here is an orchid seed sowing kit available from Amazon that includes orchid seed germination media with activated charcoal and agar, seed germination, and tissue culture. This is a good option if you don’t want to prepare your own agar.
At room temperature, the agar will have a final pH level of between 4.8 and 5.2. To make your nutrient agar medium, you will need agar powder and hot water.
Start by boiling the water. To make a liter of agar, you will need about 25g (0.8oz) of agar. Put approximately 100ml (3.4oz) of hot water into a beaker. Slowly add the agar powder into the 100ml (3.4oz) of water, stirring constantly. Once it’s mixed well, add the remaining water.
Create a Sterile Environment
Bacteria, fungi, and algae are enemies of orchid germination, so you have to sterilize your working space. Place your flasks, beakers, and tweezers in an oven at 180°C (356°F). Leave them inside for at least 10 minutes. Let the flasks cool off before you close the lids.
Select a clean room with an easy-to-clean workbench. Use bleach to clean all surfaces in your designated room. If you can get a glove box, that’s your best bet to create a secure and sterile environment. Though you may not reach lab-level sterility, your goal is to kill all bacterial cells and fungal spores.
Sow the Seeds
Put all your flasks, the eyedropper, tweezers, the ready medium, and seeds inside the glovebox. Include a spray bottle filled with bleach.
If your glove box has a filter and fan, switch them on now. Wear your gloves, then spray everything inside the box with bleach. Wash your gloved hands and forearms with bleach.
Give the bleach a few minutes to work, then get the bottle containing seeds and the eyedropper ready for the next step. Dip the eyedropper into the hydrogen-peroxide mix and get around 3ml (0.1oz). Drop the liquid into about 100ml (3.4oz) agar nutrient mix inside a flask. Close the flask immediately after.
Take your Ziploc bags and spray them with bleach inside and out. The bags need to be transparent as the germinating seeds will require sunlight.
Put your flask inside the Ziploc bag. Label the bag with the date and name of the orchid species. Once you’ve completed orchid flasking, place the bag on a clean surface near a window where they receive direct sunlight. Clean your work area, so any loose seeds don’t later mix with your next batch of seeds.
The Germination Process
Orchid seed germination starts with the swelling of the embryo. Some types of orchids may form chlorophyll at this point, while others won’t. The embryo keeps swelling until it bursts out of the seed coat. The result is a spherical or cone-shaped emerging seedling. This process is known as the protocorm stage.
On the seed’s upper surface, the first signs of a leaf appear as a small bulge. On the lower side, absorbing hairs appear, and the protocorm becomes wider. Soon after, the first leaves emerge, followed by the first roots.
Orchid Maintenance
Some orchids germinate within a few days, while some may take months. Let the flasks remain undisturbed but check progress frequently. Only fertilize your orchids after you have spotted the roots emerging.
If it’s a slow-growing species, the agar may start looking cracked due to water loss. If you notice signs of dehydration, transplant the orchids to new flasks. Use the same sterilization process you used for germinating the orchid seeds. Before opening the old flask, wipe it with a clean paper dipped in bleach or 80% alcohol.
Orchid seedlings take between 4 and 8 weeks before they reach the ideal size for transplantation. Each seedling should be removed from the first flask containing the starting agar and put into a new container filled with maintenance agar.
Deflask the Orchid Seedlings
Eventually, the young orchids will have to move to pots filled with coarse tree bark and other materials. Only move the orchids when the roots are visible, and the plant is big enough to handle. Wash off the agar, then swirl the roots in distilled water to remove any sugar residues. Organic residues can attract bacteria and molds.
To protect your precious orchids from drying up, follow these steps:
- Transfer them to a plastic box first.
- Add some sphagnum moss or paper to the box and spray some water on the sphagnum moss, paper, and orchid.
- Put the box in a shaded area, preferably outdoors.
Start Potting Your Orchid Plant
When your seedlings grow, you have to deflask and pot the plant. Start by watering the plant to make the roots wet and loosen the medium. This is a good process for deflating sympodial and monopodial orchids.
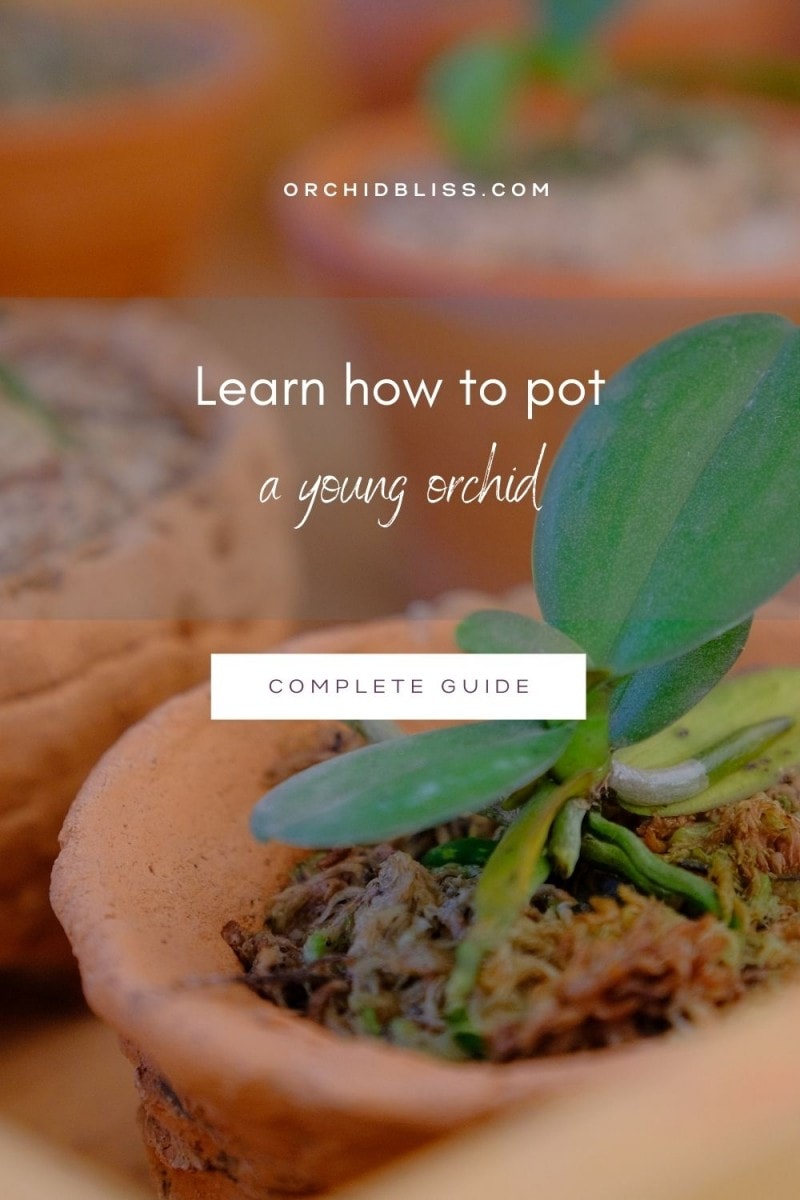
Find a clean pot with many holes at the bottom, and fill up the pot with coarse fir bark to about two inches (5.08cm) from the top. Add redwood shavings, horn meal, and dolomitic limestone.
In a cooking pot, heat some water to 96°F (35.6°C). Submerge the orchid containers to soften the agar for between 30 minutes to one hour. Gently pull out the seedling, taking special care not to damage the roots. Wash the orchids in tepid water to remove any remaining agar.
Plant your seedlings two inches (5.08cm) apart inside the pot. Find a small tray and put in some small pebbles. Pour some water inside the tray, then place your pot on top of the rocks. The water will evaporate slowly, adding some humidity to the plant’s immediate environment.
Place the tray with the pot in a warm sunny spot. Slightly spray the orchid with water several times a day. As your orchids grow, practice division and transplant your orchids to bigger pots as required.
Divide Your Orchids
Knowing the type of orchid you have and whether it’s monopodial or sympodial is important. Sympodial orchids grow horizontally, while monopodial orchids grow vertically. Division is an asexual method of propagating your orchids.
With division, instead of growing the orchid from the seed, you will be multiplying the mother plant. Division is the process of splitting the mother orchid into two or more actively growing plants. The baby plant is sometimes referred to as a Keiki and is an exact clone of the mother plant.
Division is often done when the orchid is ready for repotting. The orchid has probably outgrown its pot, or the plant’s center seems to be dying out.
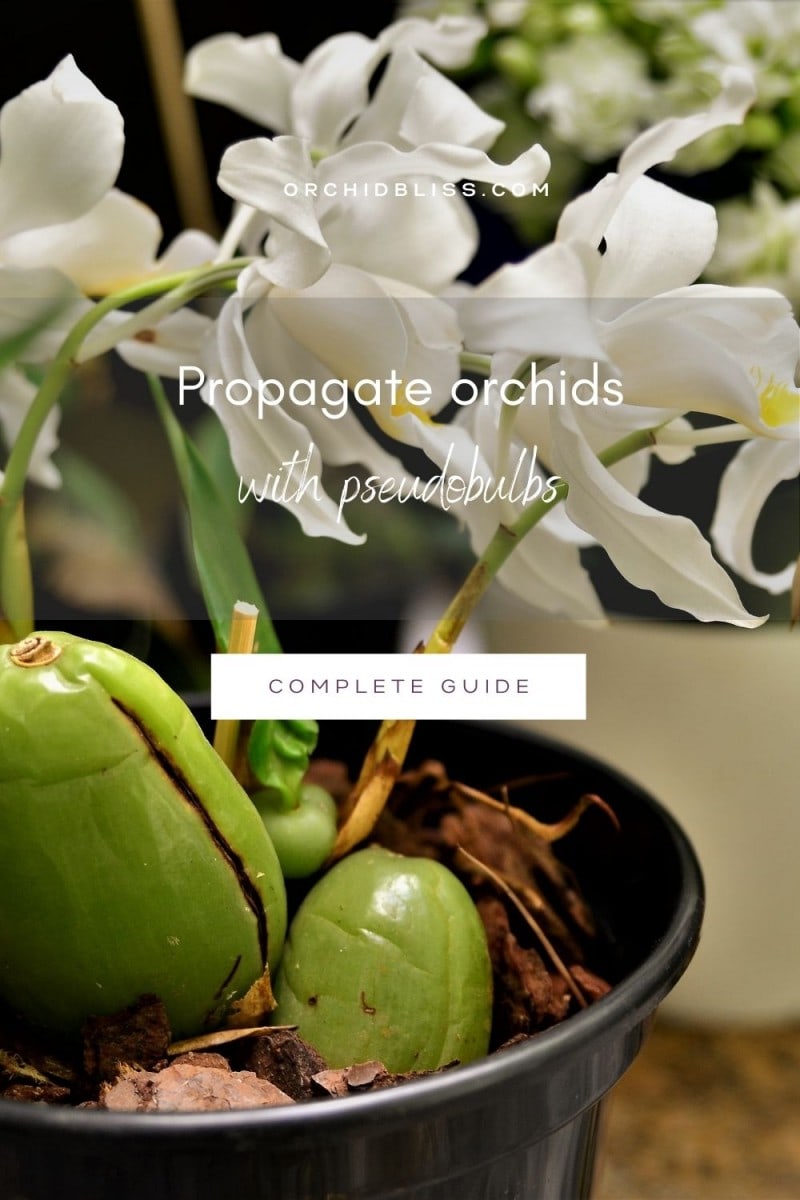
To divide a sympodial orchid, use a sterile scalpel to slice through the rhizome. Ensure you’ve left at least a few leafy growths on each of the divided sections. At this point, you may also remove any disheveled pseudobulbs and damaged roots. Once you have separated the sections, pot them each in their pot.
The division of monopodial often involves cutting off the top of the plant. As monopodial becomes older, the bottom becomes leafless while the top loses some of its beauty. If you cut off the top, make your cut right below a node on the stem. Check that there’s a well-developed root system just above your cut. Then, plant the upper part in a new medium.
Another division method for monopodial is to cut the stem directly below the air layer. This method is used when the aerial roots seem to be rotting. Before you cut, you must first go through the process of strengthening your roots, as detailed above.
Always remember to keep detailed records of all propagations. Repot your orchid in a bigger size than its former pot. Time the division, so it happens just before the next growing season. Never use tools on your orchids unless you have first sterilized the tools and your gloves.
How to Grow the Roots of an Orchid
There may come a time when you notice your orchids withering or the roots looking like they’re rotting. To bring your plant back to health, you can focus on growing the roots.
- Start by carefully washing off the medium and cleaning up the roots with distilled water.
- Douse the roots with hydrogen peroxide.
- Soak the bare root plant overnight in tepid water.
- The next day, boil distilled water and dump a tea bag inside. You want to capture the tannin in the tea leaves.
- Let the water cool down before adding a few drops of fresh lemon.
- Add some rooting hormone concentrate (for example, K-L-N), then insert the plant, submerging the roots.
- Soak the plant for an hour.
- Transfer the orchid plant to an empty pot and cover lightly with a polythene bag or Ziploc bag.
- Leave them overnight.
- In the morning, your roots are dried out. Put the plant in a small pot and then inside a Ziploc bag.
- Add some moist moss inside the Ziploc but outside the pot.
- Blow the Ziploc with your breath, like a balloon. Blowing adds some carbon dioxide and moisture.
- Zip up the bloated bag.
- Leave the orchid in for about a week and repeat the process. After a second week, the roots will be strong, and the orchid will be ready for potting.
Reasons Why an Orchid Won’t Germinate, Grow, or Bloom
- Root damage: Take care when repotting. Repot when new roots start growing.
- Root suffocation (root rot): Use ventilated pots and mediums with lots of air pockets.
- Too much algae: You may have to use a new flask or pot.
- Salt and organic buildup: Use clean, fresh water, and avoid organic fertilizers.
- Lack of nutrients: Use processed fertilizers to provide Calcium.
- Too much light: Orchids need at least 12 hours of darkness per day.
- Hot sun exposure: Most types don’t fare well in direct hot sunlight. Place in light shade or expose to morning sunlight only.
- Inadequate division: Orchids thrive when they grow in clusters. However, take care not to crowd them in one pot.
- Temperature swings: Don’t change orchid positions too often. Avoid placing in front of heaters, fans, and ACs.
Requirements for Proper Germination
Orchid seeds are unique in what they need for proper germination and subsequent development. The requirements vary a lot, owing to the great number of orchid varieties and different grower climates. The different agar, nutrients, and fertilizer mixtures also impact the seed’s germination and growth to maturity.
However, despite the many differences, there are many shared requirements. These include:
- A high degree of sterilization during seed handling and germination
- Enough brightness even when in a shaded area (diffused indoor lighting works well too)
- Course pot filling and many holes in the pot to allow water drainage and adequate movement of air
- A slightly acidic pH for the medium (agar used in germination)
How to Tell the Kind of Orchid You Have
There are hundreds of thousands of orchid species, and each has special needs for germinating, growing, and blooming. If you are harvesting your seed from one of your plants, check whether there was a tag from when you bought the first plant.
If there is an abbreviation, that may be the short form of the name. You may consult a botanist in your area or use an online search engine to identify what the abbreviation means.
If there are no identifying tags, one of the easiest ways to identify an orchid species is by looking at the flowers. Note the flowers’ shapes, sizes, colors, patterns, and size of bloom.
If the orchid isn’t in bloom, you might have to identify it by checking the leaves, roots, and other plant traits. Click here for a post on how to identify orchids.
Most Common Orchids to Grow at Home
Some orchids are easier to grow at home than others. Your success at growing an orchid depends on the type of seed, location and climatic conditions, amount of sunlight, and sterilization level. Some of the most common orchid types that people grow from seedlings at home include:
- Phalaenopsis Orchids: Originally from Asia, they thrive in daytime temperatures between 75°F (23.9°C) and 85°F (29.4°C) and night temperatures of around 60°F (15.6°C). They can survive outdoors in the United States Department of Agriculture (USDA) plant hardiness zones 6 to 11. Click here for a care card.
- Narcissus Triandrus ‘Thalia’: It is a hybrid native to southwestern Europe. It grows in all USDA plant zones except for warm areas like Southern Florida. It likes partial shade and full sunlight.
- Brassavola: Native to the American tropics, they bloom all year round. They are one of the least challenging to grow. They have long tubular leaves and sprout many flowers. Click here for a care card.
- Cattleya: Originally from the Asian tropics and Australia. They take four to seven years to mature when planted by seed. Click here for a care card.
- Encyclia: Found in Florida, Mexico, Central America, South America, and the West Indies. They can bloom for several months at a time.
- Dendrobium: Native to Southeast Asia. There are about 1,200 individual species. They grow in many different kinds of climatic conditions. They thrive in hanging baskets with little or no potting media. Click here for a care card.
- Cymbidium: They come from Asia and Australia. They are more cold-tolerant than most other orchid species. Seedlings take several years before they flower.
- Vanda: Native to Asia and have over 80 species. They are monopodial and are best planted in early spring, and they are fast growers. They prefer a soilless medium and thrive in USDA zones 10 and 11. Click here for a care card.
- Oncidium: Difficult to pin down origins as they are found in different climates—from sea-level tropics to cold mountains. It needs sunlight but can also grow under artificial light. Click here for a care card.
- Laelia: They thrive in bright conditions but not in direct sunlight. They don’t require high humidity but need to be kept well hydrated.
- Catasetum: They are native to northern South America and Central America. They can grow in most USDA plant zones and prefer part-shade outdoor conditions.
- Cycnoches: Found in Mexico, Central America, and South America. They thrive in bright, shaded areas away from direct sunlight. You may also grow them indoors and provide diffused lighting.
- Cymbidium: They are native to tropical and subtropical Asia and Australia. They thrive as house plants in all USDA plant zones.
- Epidendrum: It has more than 1,000 species and is native to tropical and subtropical North and South America. They need bright light to bloom.
- Ludisia or jewel orchid: They are native to Southern and Southeast Asia and can grow in most USDA plant zones. They thrive in the bright shade outdoors or indoor with diffused lighting. These orchids are grown for their intricate leaf patterns rather than for their flowers. Click here for a care card.
Can You Grow Orchid Seedlings in a Bottle?
Yes, you can grow orchid seedlings in a bottle. Most orchid seedlings grown from home begin their life in a bottle. Mason jars, whisky flasks, and baby food jars are some of the most common containers used to germinate seeds and maintain seedlings.
However, orchids tend to outgrow bottles eventually. When the roots and leaves seem to outflow over the bottle, it may be time to pot the plant.
How to Save a Sick Orchid
Once your orchids are growing, they usually need very little care. For most species, you don’t have to water them every day. You can even go for a short holiday and come back without worries. Nonetheless, orchids can get attacked by bacteria, fungi, and algae.
Some signs of a sick orchid may include rotting roots and discolored leaves. If you notice signs of poor health, here’s how you can revive your orchid plant:
- If the leaves look wrinkly and droopy, it may be a sign of dehydration. If the roots don’t look distressed and the stems still look strong, all you may need to do is increase the frequency of watering your orchid.
- If there’s increased shedding of leaves, it may be a sign of stem rot, dehydration, or stress. Check whether there are dead roots. Also, check whether the plants need division. More space in a new bigger pot could relieve the stress.
- Orchids often get sick due to a depleted medium. Maybe the plant has used up all the nutrients. Repotting the orchid in the new medium can rejuvenate the plant and restore its health.
Conclusion
Growing orchids from seeds may seem complicated at first but can be a fun and satisfying process. If you decide to grow your seeds, try and harvest the seeds yourself.
If seeds are unavailable for harvest, buy from reputable botanists who have experience in growing orchids. They will know how to handle the seeds to avoid contamination. Expert botanists will also provide accurate tagging.
Keep your workspace well sterilized at all times. Consider where you will place your seeds before and after germination. Placement will depend on the species and the direct sunlight required.
To help you out, here’s a list of items available on Amazon that will help you grow orchids from seed, click here.
Discover more about keeping your orchid’s leaves and roots healthy by grabbing your free cheat sheet. Click here to grab your cheat sheet to learn how to grow healthier orchids. It will be super helpful.
Sources
- The American Orchid Society: Sowing Orchid Seed
- ResearchGate: Techniques and applications of in vitro orchid seed germination
- Cornell University: Experiment 2: Asymbiotic Seed Germination and Development of Orchids
- Texas A&M AgriLife: Growing Orchids
- North of England Orchid Society: Propagating Orchids – The Various Methods…