
Some of the links on this page may be affiliate links. Click here to learn more.
Flowers are the end goal of growing orchids. To that end, there are 2 basic things that your orchids need to bloom: proper light and proper temperature. And, of course, the judicious use of fertilizer always helps.
I will share with you the tools I use to re-bloom my orchids. It consists of:
- Artificial lights. If my orchids don’t get enough light to bloom through my windowsill, I supplement natural light with artificial light. I use both fluorescents and LED light – both available on Amazon.com.
- Using grow lights? A timer is essential, and with these smart plugs, control is right at your fingertips on your phone. They’re not only convenient but incredibly easy to use. I absolutely love these plugs.
- I use a seed mat, available on Amazon.com, for warm-growing orchids that won’t grow well due to the cool winter temperatures in my orchid room.
- I also keep a humidistat, available on Amazon.com, that tracks humidity and temperature.
- Fertilizing orchids encourage bigger, more abundant flowers.
- This list wouldn’t be complete without a list of books from Amazon.com to help you grow gorgeous orchids.
That’s it – those are the tools I use to bloom my orchids successfully. Along with these tools, the trick is choosing orchids with temperature requirements you can easily accommodate. While providing more light is pretty straightforward, changing your home’s temperature just for your orchids is not.
Recommended Setup for Blooming Orchids
Light is the #1 reason for failure to bloom. When it comes to light, I don’t have an either-or mentality. I use both fluorescent and LED light in addition to natural light. With these lights, I successfully bloom everything from Phalaenopsis to Cattleya orchids.
Pro Light System

There are two things I really like about the fluorescent Pro Light System I use. First, the lights don’t get too hot, so you don’t have to worry about burning your orchids. Second, you can adjust the lights to the height of your orchids. Since Phalaenopsis is a low-light and Cattleyas are a high-light orchid, you can lower the lights for Cattleyas and bring the lights up higher for Phalaenopsis.
In addition to the height of the lights, keep in mind that the center of the bulb has the strongest light. So place orchids with higher light requirements in the center and those with lower light requirements on the edges.
Even though fluorescent lights stay cool compared to incandescent bulbs they are warmer than LED lights. If your orchids need warmer temperatures, fluorescents will release more heat.
LED Grow Lights

These Viparspectra Led Grow lights are the whole 9 yards. They aren’t cheap, but they are fantastic. The VIPARSPECTRA P2000 grow light uses modern LED technology, making it energy-efficient and strong for healthy orchids. With a dimmer knob, you can adjust brightness for different growing stages. It mimics sunlight with a blend of red and white light and stays cool with built-in cooling parts. Just set the height and brightness to what your orchids need!
Smart Plugs for Grow Lights

If you don’t want to remember to turn your orchid lights off and on at exactly the right time, a timer will do the job for you. If you’re utilizing grow lights, a timer becomes indispensable. These smart plugs put the control in your hands through your phone, offering a convenient and effortless experience. I can’t help but adore these plugs.
Seed Mat

Temperature is key to reblooming orchids. Often, we talk about light so much that we forget the importance of temperature. Orchids know what season it is – when to bloom, grow and rest – based on temperature. The truth is that both light and temperature are vital to successfully blooming orchids.
A seed mat is much simpler than using a space heater or increasing your house’s heat.
This mat will raise the ambient air temperature by 10° to 20° F /(-12.2° to -6.6° C).
Not only can you use a seed mat to help bloom orchids, but you can also use it after potting orchids, as the warmth created by the seed mat stimulates root growth and helps the orchid recuperate faster from the trauma of potting.
The seed mat allows me to grow warm and intermediate-growing orchids in the same location. In the winter, it gets down to around 55°F / 13°C in the room where I grow my orchids, so I place my warm-growing orchids on the seed mat and leave the intermediate growers to enjoy the cool winter temperatures. It works like a dream!
Two Humidistat Options
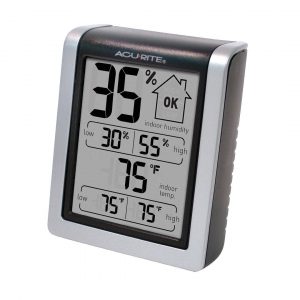
Like the timer, a humidistat is a tool of convenience. I bought this humidistat on Amazon.com to track my orchids’ humidity levels. It’s also helpful that the humidistat also tracks temperature. You can adjust the humidistat to display the temperature in Fahrenheit or Celsius. It also shows temperature and humidity highs and lows over the past 24 hours. I love this tool so much that I have two in two different locations in the same room. I know that might be overkill, but I’m nerdy that way.
Govee Indoor Hygrometer Thermometer

The Govee H5075 thermometer and hygrometer is essential for growing orchids, as it provide accurate real-time temperature and humidity readings. These factors are vital for orchids’ growth and health. The smart app alerts and large LCD display enable you to monitor and adjust conditions quickly. Its data storage and export features also help you track long-term trends, ensuring optimal care for your orchids.
Fertilizer

The judicious use of fertilizer will help you to grow stunningly beautiful orchids. Fertilizers will enhance your orchids in every way, including blooming, root systems, and leaves, fight off disease, and boost overall health.
Dyna-Gro is the fertilizer that I personally use and recommend for successfully blooming orchids. Pro-TeKt (0-0-3) is especially useful after repotting. The potassium will help your orchid establish strong roots.
Note: There are a couple of times when you should take a break from fertilizer. First, when buds begin to grow, buds are the most tender part of the plant, and fertilizer can cause the buds to wither. Begin using fertilizer after the flowers have dropped. Second, if your orchid needs a winter rest, stop fertilizing. The most important time to fertilize is active growth, or when new roots and leaves are growing.
Recommended books for growing orchids
I have books in my library to help me grow – and bloom – orchids.
Click here for the link to learn more about these books.
- Extraordinary Orchids by Sanda Knapp – Beautiful illustrations and helpful culture information.
- Orchid Muse: A History of Obsession in Fifteen Flowers by Erica Hannickel – Fun backstories about orchids and orchid enthusiasts.
- You Can Grow Orchids by Mary Noble – A small book with tons of practical information and encouragement.
- Understanding Orchids: An Uncomplicated Guide to Growing the World’s Most Exotic Plants by William Cullina – This is an all-inclusive book on orchids. If you only decide to get one book on orchids, get this one.
- Bloom-Again Orchids: 50 Easy-Care Orchids that Flower Again and Again and Again by Judy White – Get a snapshot of 50 orchids that are typically easy to grow. This is a go-to book when you’re ready to expand your orchid collection.
- Orchid Modern: Living and Designing with the World’s Most Elegant Houseplants by Marc Hachadourian – This book contains helpful culture information and beautiful projects/displays.