Ready to Go Potless?
I’d been looking for another way to grow phalaenopsis orchids and I found it when I was introduced to kokedama, a Japanese style of gardening. Which basically means moss ball gardening.
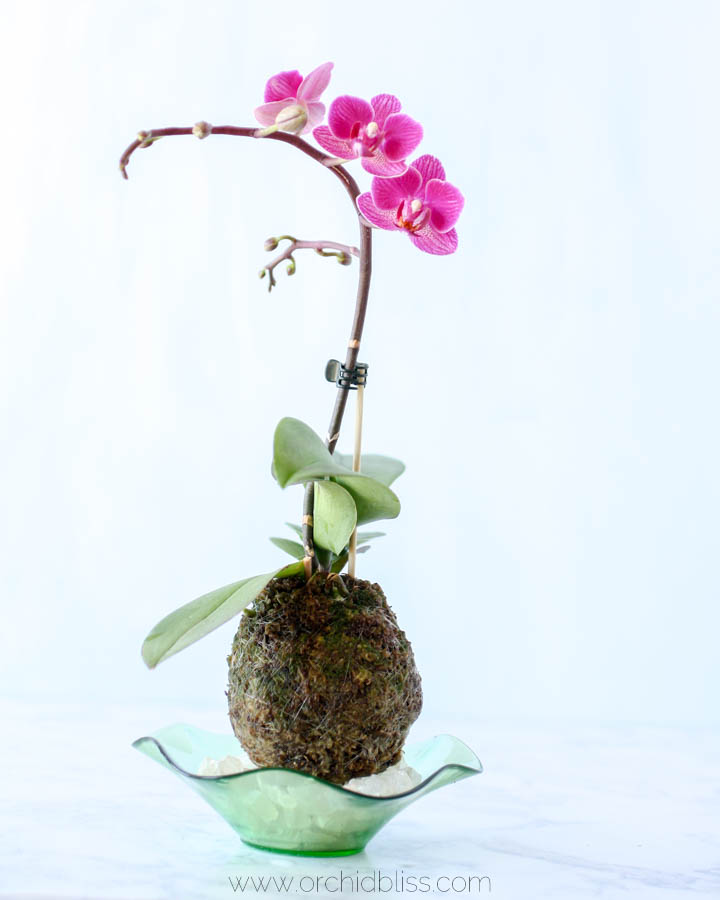
Discover the Japanese art of kokedama. I’ll walk you through the whole process. Kokedama in a nutshell: traditionally, a plant’s roots are encased in a ball of soil, which is covered with a layer of moss, forming a sphere. To display the kokedama you can hang it, or set it on a saucer or plate.

Some of the links on this page may be affiliate links. Click here to learn more.
Why My Kokedama Method Works so Well for Phalaenopsis Orchids
I’ve successfully potted many phalaenopsis orchids kokedama style. The reason kokedama works so well for phalaenopsis is two-fold.
First, phalaenopsis orchids do not have water storage, so they like their potting media to be slightly damp – not wet. Sphagnum moss – the media used to wrap the orchid’s roots – is highly absorbent.
Second, I recommend placing a Wiffle/pickle ball or a styrofoam ball in the center of the kokedama. This keeps the center of the kokedama dry. If the entire kokedama ball was composed of sphagnum moss the center would have a very hard time drying out. A continuously wet moss ball results in dead, rotten roots in the center of the kokedama.
In other words, an outer layer of sphagnum moss wrapped around the phals roots combined with a hollow, or non-absorbent center, results in a dry center in the moss ball with a damp moss ball exterior. Your phalaenopsis orchids will LOVE it!
Before Getting Started
Before jumping right into potting your phalaenopsis orchid kokedama style, there are a few things you need to know.
To begin, the best time to pot an orchid is when the orchid is in what we call active growth. It’s easy to tell when your phal is in active growth because you’ll see new roots and leaves beginning to grow and the flowers will have faded.
Next, if your orchid is in flower, or has a new flower stalk growing, it is best to wait to try kokedama once the flowers have faded. Buds and flowers are very sensitive to changes in their environment and potting is a huge disruption and will result in aborting the buds and the flowers prematurely dropping.
Finally, you can do this! Trying something new with your orchids can be scary. You’re worried you’ll lose your orchid. I’ve potted multiple phalaenopsis orchids using this method and I’ve been successful every single time.
Your List of Kokedama Supplies:
- An orchid that has finished blooming. This is the ideal time because the orchid is getting ready to grow its root system.
- Sphagnum moss. This can be purchased as a craft store or online.
- A center for the roots to wrap around. Traditionally this is a ball of soil. For example, use an orchid potting mix that is very fast-draining. Put some orchid potting mix, like fir bark in a mesh bag like the kind that tangerines come in. I like to use Wiffle balls. Do not use sphagnum moss for the center as it holds too much water. Another option is to use a 3″ styrofoam craft/floral ball. You can use a larger or smaller size depending on the size of your orchid. Styrofoam is easier to cut into as the plastic on the Wiffle balls can be pretty heavy-duty.
- Old newspapers to spread out on your work surface to make clean up easier.
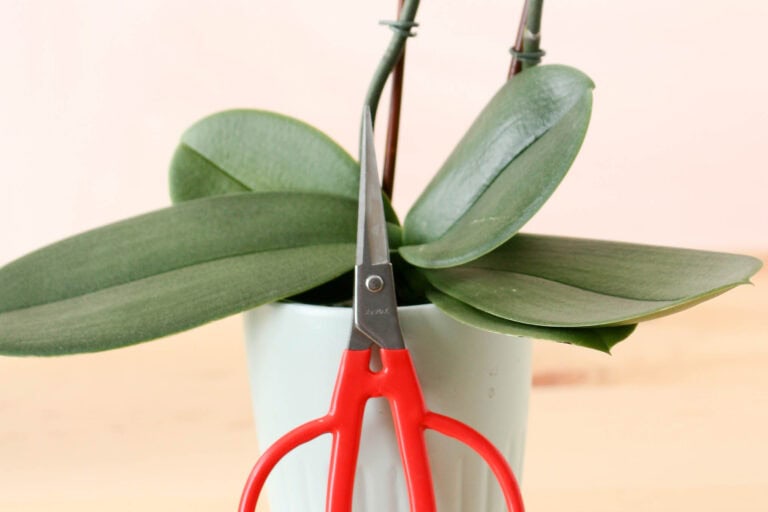
- A pair of sharp pruning shears to cut out dead, rotten roots and to snip your thread.
- A garbage can.
- Clear thread or jute. This will be used to secure the moss to the roots.
- One bowl of water.
- Water to soak orchid roots.
- Sewing needle. Tying off the thread with a knot is easier to do with a needle.
How to Make Your Phalaenopsis Kokedama in 5 Steps:
1-Set-Up the Kokedama Workspace
Before getting started, it’s a good idea to gather your materials and set up your workspace. That way you aren’t running all over trying to find stuff when you’re in the middle of the project.
2-Soak your Orchid
In the bowl of water, soak the sphagnum moss for about 20 minutes. The moss comes in a tightly compacted mini bale. Just rip off several handfuls and place them in the bowl.
TIP: Use caution when handling the sphagnum moss, there may be thorns, or stickers.

Fill the orchid pot with water to soak the orchid roots for about 10 minutes. This will make the roots more pliable and easier to work with.

3-Un-Pot the Orchid


Once the orchid has finished soaking, remove the potting medium from around the roots. Use care not to damage the roots. If pieces of the potting media are tightly bound up in the roots it is perfectly okay to leave it attached to the roots. Do not re-use any of the old potting media. Throw it away.
Now that the old potting media has been removed, using tepid water, give the roots a good rinse in the sink. Or a swish in the soaking bowl.
4-Prepare the Center of the Kokedama
Make the center ball. If you are using wood-based orchid soil, put a small amount into the plastic mesh so that it forms a ball small enough to fit inside the center of the orchid’s roots. Tie the bag off and trim off the excess mesh at the end of the knot. If you are using a Wiffle ball you may need to cut between the slats so that the orchid has a secure place to sit. It shouldn’t sit inside the ball, nor should it sit right on top. It should nestle with the roots wrapped around the ball.
NOTE: One reader commented that the wiffle ball was too tough to cut into. Alternatively, use a floral/craft stryrofoam ball instead of a wiffle ball. Use the pointed tip of a knife to cut out a wedge for the orchid to sit into.


5-Wrap the Moss Around the Roots
Take a piece of re-hydrated moss, the longer the string of moss the better, and wrap it around the orchid’s roots. If the moss is too wet, you can give it a gentle squeeze.

After the 1st layer of moss covers the roots, begin wrapping the clear thread over the moss.

Continue to layer the moss and secure it with the thread. Use care to keep the moss ball in a nice round shape. Be as generous as you’d like with the moss and thread 😉

Once you feel like you have a nice round shape and the roots are completely covered, your kokedama is finished.

Cut the thread leaving a 12″ tail. Thread the needle and secure the thread with a knot.
As a finishing touch, you can wrap some jute around the kokedama.
Caring for Your Kokedama
The beauty of kokedama is both the happy response of the orchids to this method and the ease of care. Here’s how to care for your phalaenopsis when potted kokedama style:
Watering
Once a week, submerge the kokedama in a clean bowl of clean water. Let it sit in the water for several minutes until the moss has absorbed all the water it can hold. Allow the kokedama to drain in the sink. Then, give the moss ball a gentle squeeze to remove excess water.
Feeding
Add 1/2 to 1/4 strength balanced fertilizer to the water 3 out of 4 weeks to the bowl of water. Though it may seem like a waste of water and fertilizer it is important to use new water and fertilizer for each orchid.
Cleanliness to avoid spreading pests and diseases is a top priority. If you’ve ever dealt with scale or any other pest, or infection, you know how easily it spreads and how difficult it can be to eradicate. I promise, taking these extra precautions is worth it.
Leaching Salts
Simply put, orchids that are properly fertilized perform much better than those that aren’t. The flowers are bigger and more plentiful. The leaves and roots are more robust.
The downside is that fertilizers contain salts that are absorbed by the sphagnum moss and orchids don’t like salts.
Fortunately, there is a way to leach these salts out of the sphagnum moss. Every 6 months place your kokedama in a bath of distilled water for about an hour. Allow the water to drain from the moss ball and gently squeeze to remove excess water. Repeat one week later.
Light
Phalaenopsis orchids thrive in bright, indirect light. If your phalaenopsis doesn’t get enough light, it won’t bloom. And, that, my friend, is very sad. Bright morning sun near an east-facing window is ideal.
Keep an eye on your orchid’s leaves. If they get too much light they will sunburn. You can recognize sunburn because the leaf tissue will have collapsed and will turn black. If you only have a south or west-facing window a sheer curtain will block the intensity of the direct light. Moving the phal a few feet back from the window is also a good way to prevent sunburn.
Temperature
One reason phalaenopsis orchids are so popular is that they thrive in typical household temperatures. Aim for temperatures between 70°-80° F / 21°-26.7° C most of the year with a winter drop between 55°-60° F / 13°-15.6° C for 4-6 weeks.
TIP: Don’t forget about the winter temperature drop. It’s these cooler temperatures that trigger blooming.
When to “Re-Pot”
Sphagnum moss lasts about a year before it breaks down. Plan to replace the sphagnum moss yearly. In other words, re-kokedama your kokedama.
When the Phal’s Roots Grow Through the Sphagnum Moss
Some people panic when they see their orchid’s roots grow through the sphagnum moss. Don’t panic.
Instead, if you see roots growing through the moss give yourself a pat on the back. Your phal has a healthy, vigorous root system. You’re doing a good job caring for your phalaenopsis.
Some people are tempted to cut off exposed roots. Resist.
Rather, embrace these fleshy roots. Be glad that your orchid is thriving.

Phalaenopsis Care Card
To help you care for your Phalaenopsis orchid, I’ve created an easy-reference, downloadable care card. And, it’s free. The care card includes helpful information on temperature, light, humidity, and water. You can print the care card, or keep it digitally on your phone. To access your Phalaenopsis Care Card, CLICK HERE.
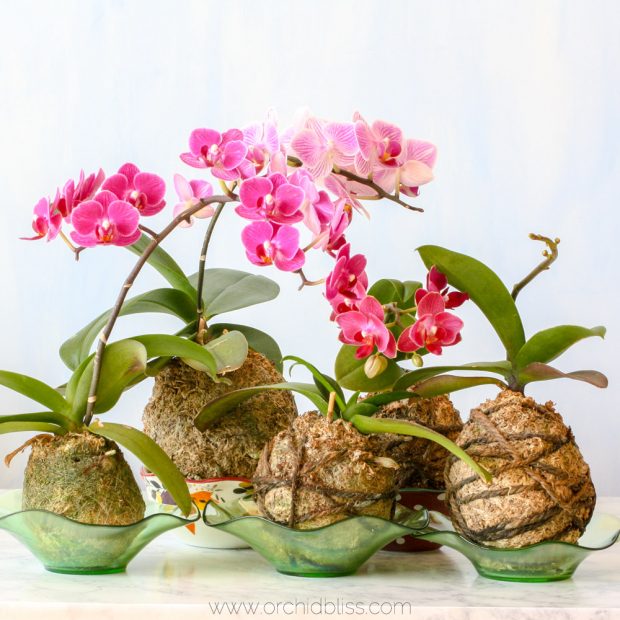
Enjoy Your Kokedama
I went through a kokedama-making phase and now I have about 5 of them. Once you have the little bale of sphagnum moss, you’ll have enough to make as many as you (and your friends) want. After a while, you will notice orchid roots making their way through the moss. That is perfectly natural. Don’t trim off. These roots are a sign that your orchid is healthy and growing. You will get some pretty wild roots. After about a year, you will need to redo the kokedama.

Once you get started, it may be hard to stop 🙂
Take a Look at My Kokedamas
Learn More About Orchids