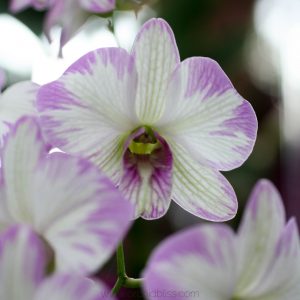
Do you ever feel like orchid care is just too complicated? Are you done trying to figure out if your orchid does or doesn’t need water? If this sounds familiar, I would like to introduce you to semi-hydroponics.
Semi-hydroponics takes the guess-work out of watering and lengthens the time between watering. This method uses Lightweight Expanded Clay Aggregate (LECA), an inorganic clay pellet that has been heated and tumbled in a rotary kiln.
Some of the links on this page may be affiliate links. Click here to learn more.
What Is Semi-Hydroponics
Basically, semi-hydroponics means that plants are potted using LECA clay pellets. The LECA hold water and hydrates the plant’s roots. The roots are allowed plenty of air circulation because LECA doesn’t compact.
This sounds bizarre, but I swear it’s true: eventually the roots will grow down into the water.
How Often Will I Need to Water?
Because the LECA holds water, you will only need to water every 2-3 weeks.
How to Water Semi-Hydroponically Grown Orchids
First, flush the orchid with water. This will wash away excess salt build-up. Then leave about an inch of water in the bottom of a saucer or decorative pot.
How to Fertilize Orchids Grown Semi-Hydroponically
Because LECA clay absorbs salt it is vital that when watering you allow water to thoroughly flush through the pot. After flushing water, add 1/4 strength of the recommended fertilizer dosage to the water. Once a month, water without fertilizing the orchids.
TIP: Do not pot your entire collection all at once.Try semi-hydroponics with just a couple orchids at a time.
Patience is Key
It takes time for the orchids to adjust to semi-hydroponics. After potting semi-hydroponically, it took about 4 months before I felt confident that my orchids were doing better, or as well, with semi-hydroponics than they were with conventional potting.
Selecting the Orchid to Try Semi-Hydroponics
For best odds try semi-hydroponics with a healthy orchid, just beginning to put out new roots. The Phalaenopsis is a good orchid to start with. They are robust and are the least expensive variety.
Personally, I just can’t chance sacrificing my healthiest, most robust orchids. What if they don’t acclimate? I admit to using orchids that I feel have nothing to lose. That way I’m not out anything if they don’t make it.
In fact, right now I’m experimenting with some Dendrobiums on their last leg that I got on clearance at the grocery store. They had been grossly overwatered at the store. I’ve potted them semi-hydroponically and one is growing new roots! Time will tell if they will survive.
Start Slowly
At any rate, it’s your choice which orchids you decide to pot semi-hydroponically. But, I do advise that you start with only one orchid at a time. Also, you have the greatest chance of success with orchids that are growing new roots.
Materials
Begin by gathering your materials.
- An orchid. I suggest starting with a Phalaenopsis, as they are the least expensive variety. That way if it doesn’t work, you aren’t out much.
- LECA clay
- An old colander, for rinsing the LECA
- Root Stimulator
- Torch for sanitizing pruning shears or scissors
- Pruning shears or scissors
- Liner pot, or net pot. Base the size off of the current pot size.
- Decorative pot or saucer. As above, base the size of the saucer or pot off the size of your liner pot, but I do think these Pioneer woman measuring bowls are cute if your orchids are on the small side. Or, these bowls, if your orchid is larger.
- Keep a garbage can nearby
- Newspaper for easy cleanup.
- A seed mat to help the roots become established. This is not a must, but it is one more thing you can do to help ensure success.
- Fertilizer is especially important if you pot your orchids semi-hydroponically.
Day 1
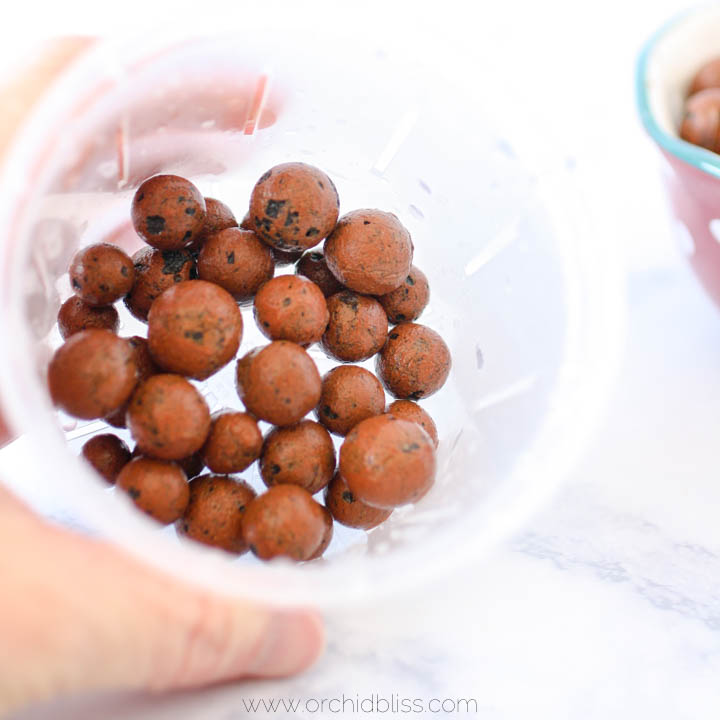
Rinse the LECA pellets and soak overnight. This will maximize the water-holding capacity of the pellets. Add 1 tablespoon of root stimulator per gallon of water.

The day before potting, rinse the LECA in water until the water runs clear. Once all the red, powdery dust has been rinsed away, soak the pellets overnight in a bucket of water. Add 1 tablespoon of root stimulator per gallon of water.
Day 2
Unpot your orchid. Remember not to re-pot your whole collection. Again, it is recommended that you use only healthy plants to give them the best chance that they will adapt to this new watering method. I’ll admit that I have a hard time with this recommendation.
The orchid I’m showing in this post is a Phalaenopsis I found on clearance at Lowe’s.
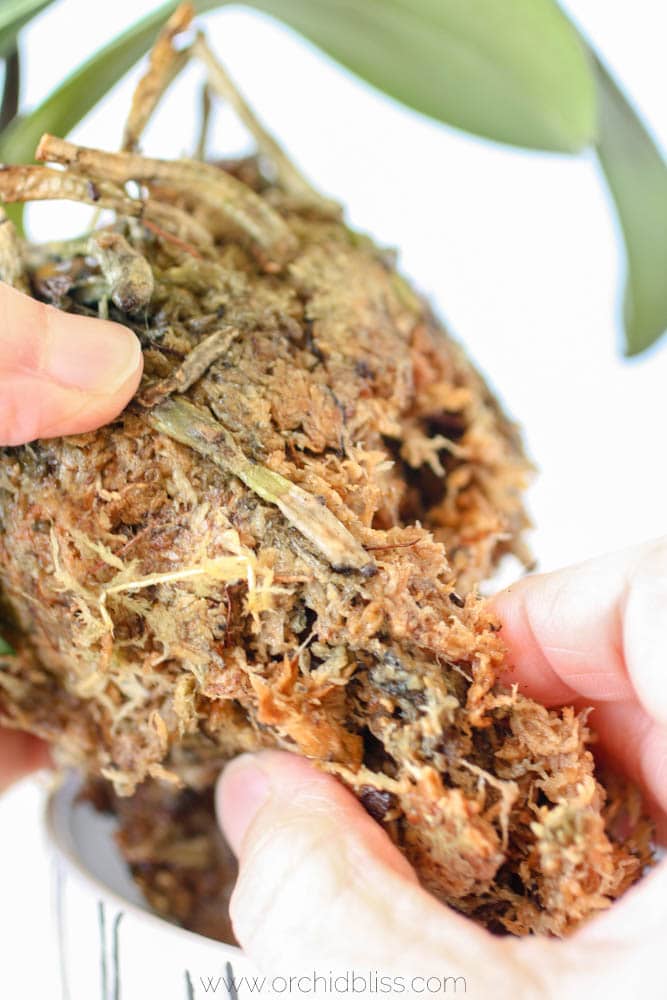
When you’re ready to unpot, soak your orchid in water to loosen the potting medium and make the roots more pliable. While the orchid is soaking, spread out newspaper over your work surface. After the orchid has soaked for about 20 minutes unpot your orchid. Pick away all the potting media until the roots are clean.
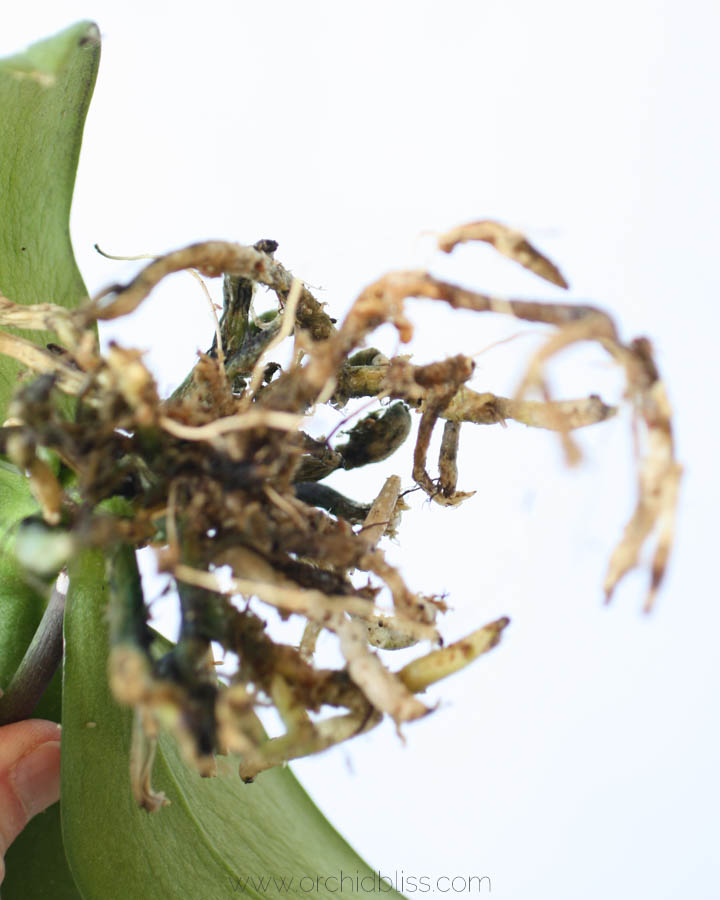
I picked up this Phalaenopsis on clearance at Lowes. The poor orchid has been terribly over-watered and the roots are in bad shape.
After cleaning away the potting media by hand, rinse the roots in tepid water to further remove organic material from the roots. Using sanitized pruning shears or scissors, snip away dead, limp roots.
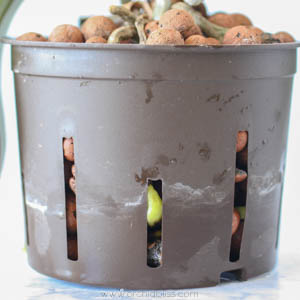
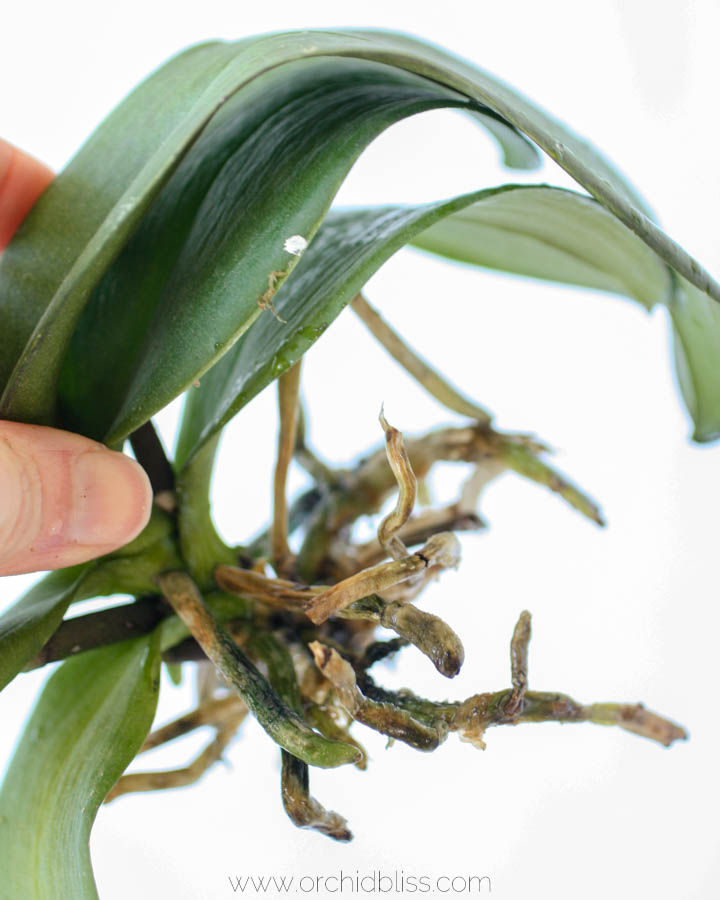
Next, add a layer of LECA pellets to the bottom of the liner, or culture pot.
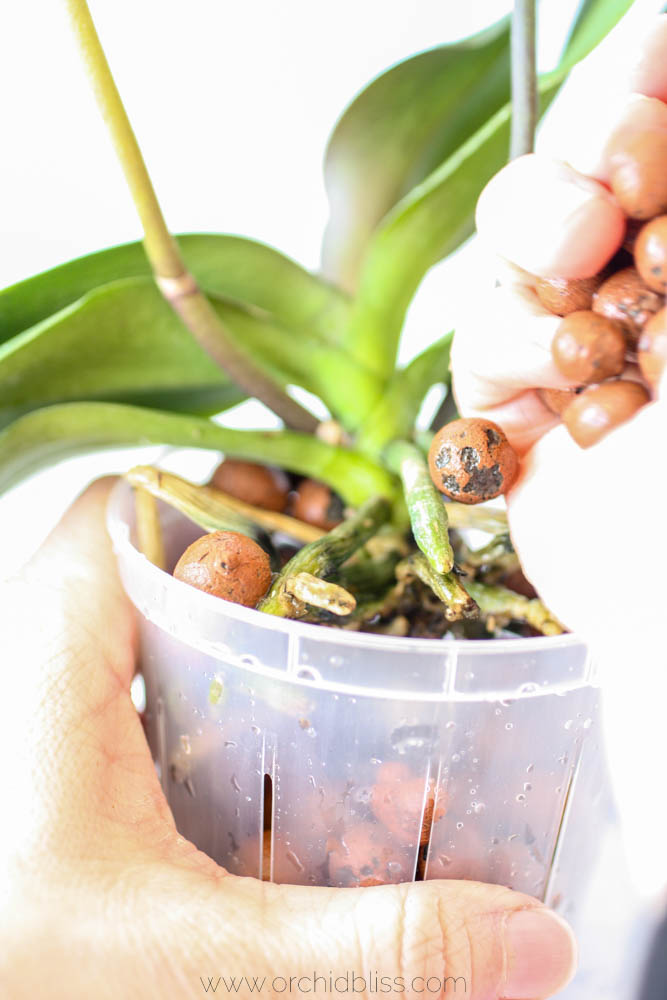
Place the orchid in the liner or culture pot and begin adding LECA. Shake the pot so the LECA settles and fills in gaps. Twist the pot so that the roots curl down into the pot. Take care so that the orchid roots are covered with LECA, though aerial roots should remain free to the open air.
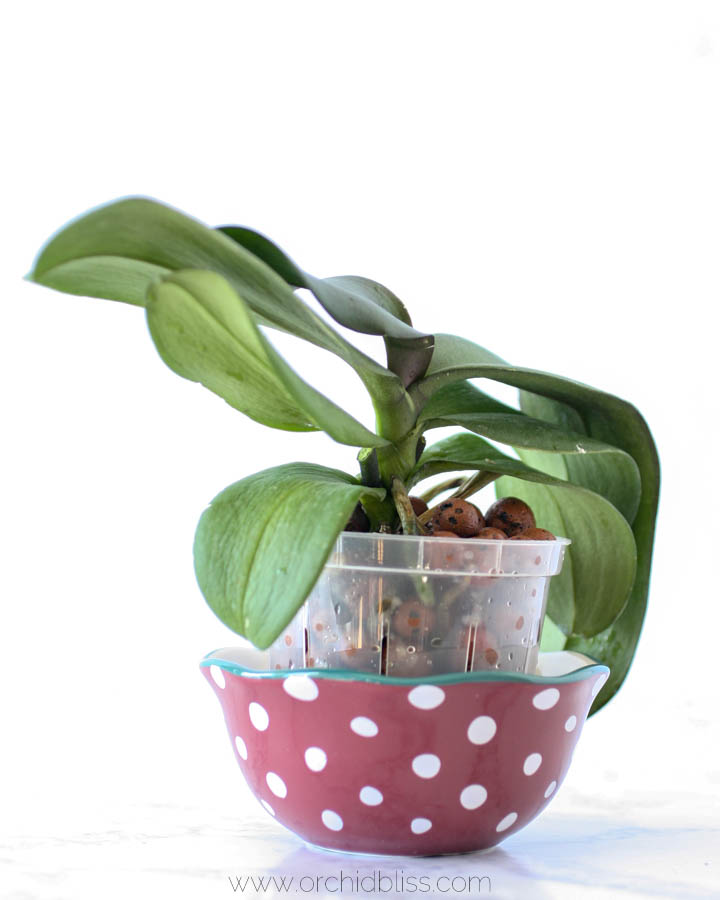
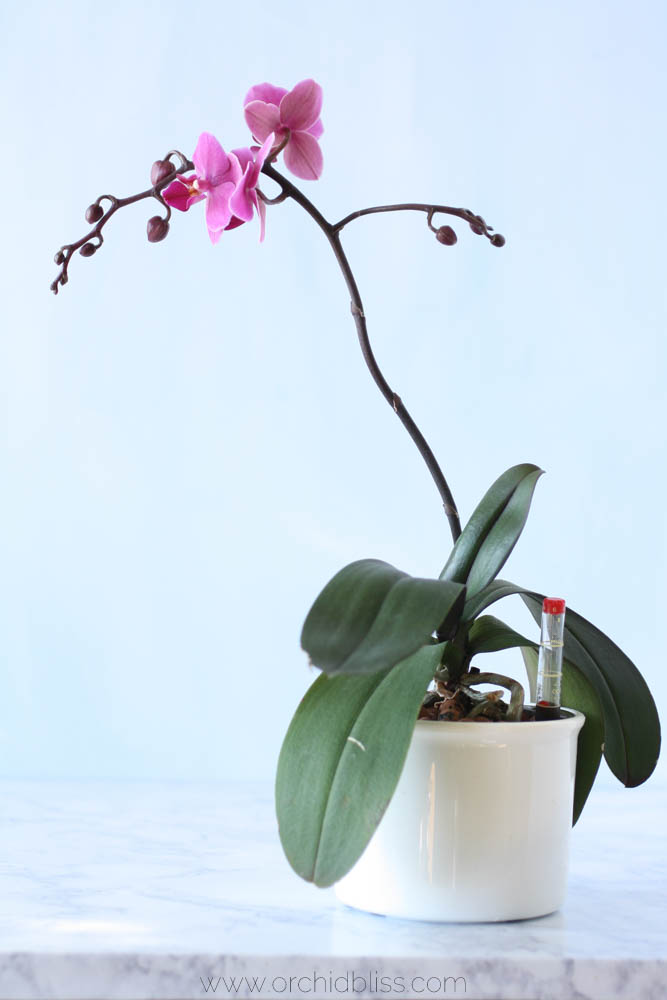
After potting the orchid semi-hydroponically, you have a couple of options. One option is to place the liner or culture pot in a saucer or shallow dish. Add a bit of water. This is important: make sure the water level is below the orchid’s roots. Another option is to use a plastic outer pot with holes drilled about an inch above the base of the outer plastic pot. A third option is for those who have purchased a semi-hydroponic kit. In this case, add water to the pot below the recommended water level on the watering gauge.
TIP: After potting your orchid semi-hydroponically, it is vital to keep the water level below the roots. Let the roots grow down in to the water.
Four Months Later
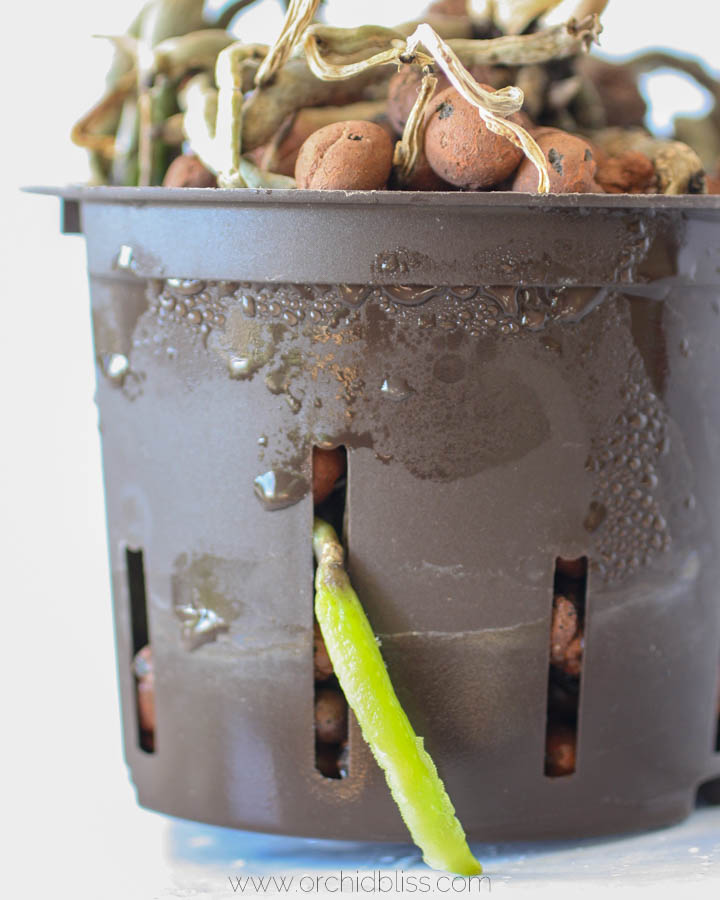
Four months after potting, this orchid is well established. The root is growing down into the water. To help ensure the success of my orchid’s roots, I set the pot on a seed mat. The constant, warm temperature encouraged strong root growth.
This semi-hydroponically potted orchid is loaded with buds and the roots are well established. The leaves are still recovering. They could be a bit more upright.
Another Reminder About Fertilizing
With semi-hydroponics, the orchid is in a bit of a catch-22. The only nutrients the orchid receives are through fertilizer. There is no soil. LECA is an inorganic component that will not break down. LECA pellets do absorb fertilizer salts.
To get around this fertilizer salt problem, this is what I do: When watering I rinse the LECA with clean water, without any fertilizer. After the LECA has been rinsed, I add water with 1/4 strength fertilizer to the pot.
Re-Using LECA
LECA pebbles can be reused as it is made of inorganic material. Here’s how EasyGrowHydro recommends cleaning LECA to reuse:
- Dry out the LECA outside in the sun.
- Pour LECA from one bucket into another in front of a fan. This allows the organic matter to blow away.
- Pick out and discard pebbles with a white coating.
- Soak in bleach for several hours. 1:10 parts bleach to water.
- Rinse thoroughly.
Another method is to use a pressure cooker or an oven to prepare your LECA to reuse.
You Can Do It!
When potting semi-hydroponically, remember to take it slow. Don’t re-pot your entire collection at once. Also, keep the water level well below the root level until the roots are accustomed to growing semi-hydroponically. Caring for orchids is always an experiment. If you are looking for a way to simplify orchid care, this method may be for you.