The Most Natural-Looking Way to “Pot” Your Orchids
I’ve been growing orchids for over a decade and have used just about every kind of orchid pot imaginable. I’ve found that mounting an orchid has some real advantages. Besides being the truest-to-life way to display an orchid, mounted orchids can live on their slabs for years.
It can be hard to wrap your head around foregoing a pot in favor of a wood slab orchid mount. But, for the most authentic look, opt for a mounted orchid. Here’s a complete guide to mounting orchids with 11 tips to help you get started and help you care for your mounted orchid for many happy years.

Some of the links on this page may be affiliate links. Click here to learn more.
1- Mounted Orchids – The Way Nature Intended
In nature, many tropical orchids are epiphytic and grow on trees or branches with long, plump roots extending far from the plant. A pot confines a naturally meandering root system.
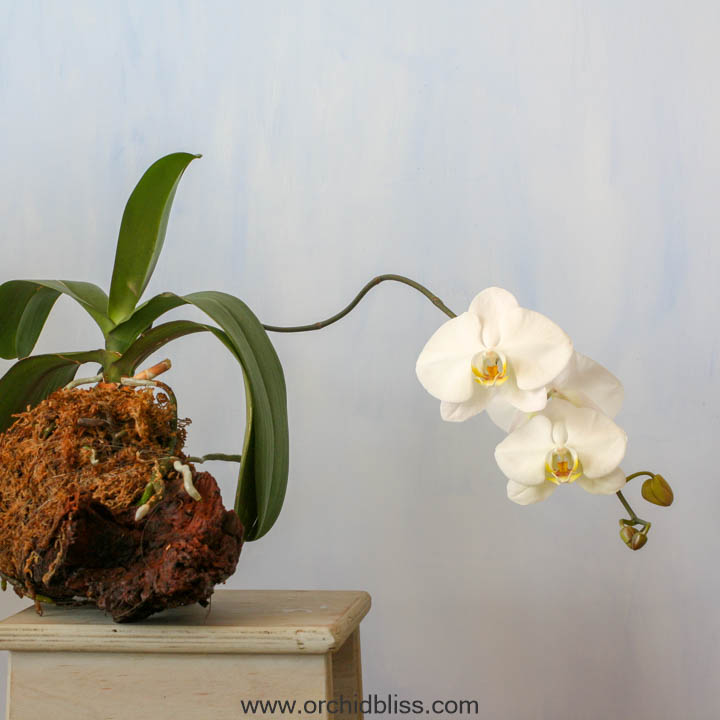
Many orchid flowers grow pendulously, and the stalks are staked for easy viewing. When displayed from a higher vantage point, the flowers of mounted orchids do not require staking and look as they would in the wild.

2- Versatility
When potting orchids one thing that may come to mind is versatility. Orchids can be potted in a traditional pot, or even without a pot, in a moss ball, kokedama style, or they can be mounted.
A mounted orchid can either be hung or placed on a tabletop. While mounts that are hung take up less space, providing more room for more orchids, table-top mounts are easier to make as the mount doesn’t have to be equipped with a hanger. Just be sure to protect your surface if you opt for a tabletop mount.
3- Mounts Last Longer Than Pots
Healthy orchids grow quickly with vigorous root systems making it necessary to re-pot the orchid. Orchids that are mounted rather than potted can live for many years on a slab of wood. Orchid roots can stretch out and the rhizome of sympodial orchids can lengthen and grow beyond the constraints of a pot.
While orchid enthusiasts are encouraged and thrilled to see the rhizome making its way over the edge of the pot, it also indicates that re-potting is in order. Not so for mounted orchids.
4- Why Not Mount Your Orchids
Like everything else in life, there are pros and cons to mounting. The most important drawback is that mounted orchids need more water than potted orchids.
Not only do mounted orchids need more frequent, perhaps daily watering, as their roots dry out much more quickly than potted orchids, but they need more water in the air. If you don’t have the time to dedicate to daily watering or the ability to provide high humidity, you may want to forgo mounting your orchid.
If these limitations are not a problem for you, you’ll be able to enjoy orchids displayed in a natural way, delay potting, postpone re-mounting for years, and, if you decide to hang your mounts, you can free up space for many more orchids.
5- When to Mount an Orchid
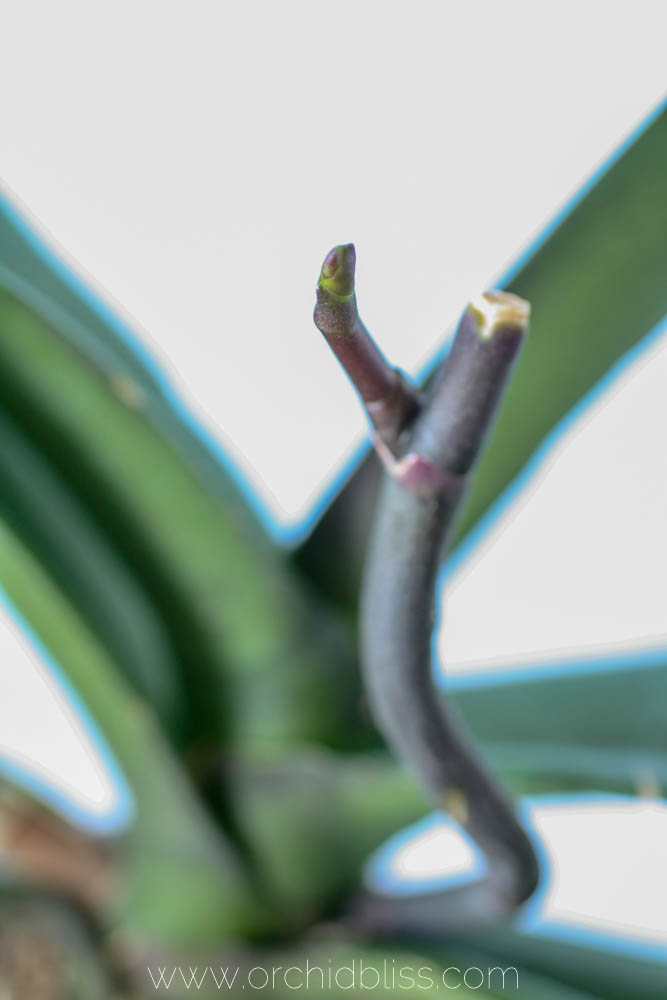
When it comes to when to mount an orchid, the same rules apply as potting. The best time to re-pot, and to mount, is when new roots are just beginning to grow. For many orchids, this is in the spring. New roots help ensure that the orchid will adapt well to the mount and recover faster from the trauma of potting/mounting.
6- Materials for Mounting an Orchid
When selecting your mount, you want to choose a mount that will last. The beauty of a mounted orchid is that by mounting, you won’t have to worry about re-potting. Pick a wood slab that allows for several years of growth. To check out my favorite mounting materials on Amazon, click here.
Choose a Long-Lasting Hardwood Mount
- Hardwood tree branches
- Sassafras
- White oak
- Highbush blueberry
- Dogwood
- Mesquite
- Some fruit trees
- Citrus
- Cherry
- Persimmon
- Mopani – used for terrariums
- Tree fern slabs
- Cork bark
- Cedar
- Redwood
- Mounting kits
Wood to avoid
- Treated
- Preserved
- Painted
- Saltwater driftwood
- Walnut
Material to Wrap Roots for Added Moisture
- Coconut fiber
- Sphagnum moss
Other Materials
- Rigid wire
- Wire snips
- Needle-nose pliers
- Electric drill
- Fishing line
Of course, you will need a healthy orchid.
7- Orchids Recommended for Mounting
Many types of orchids do better mounted than potted ones. The poster child/orchid for loving mounts is probably the cattleya orchid. Cattleyas can grow to be very large and well suited to mounting.
For your first mount, I recommend the Brassavola Orchid. These orchids are in the cattleya family. They are fairly drought-tolerant, and thus the recommendation. When in bloom, brassavola orchids have a lovely evening fragrance.
Orchids Recommended for Mounting
- Brassavola
- Vanda
- Angraecum
- Cattleya
- Tolumnia
- Phalaenopsis
No matter which orchid you choose, make sure it is healthy with a vigorous root system. You want an orchid that is in active growth, meaning that new roots are emerging.

8- How to Prepare a Hanging Mount
If you’re using a rounded section of wood and you want a flat side to rest against a wall, if you’re hanging it, or to sit flat on a surface, you will need to cut the wood in half the long way, using an electric saw or hatchet. This will give you two mounts.
To hang the mount, drill a hole through the top of the wood and thread the wire through the hole. Cut the wire with the wire-cutters leaving enough length to create a loop from which to hang the mount and to twist the end of the wire together. Using the pliers, twist to form a hanging loop on the end.
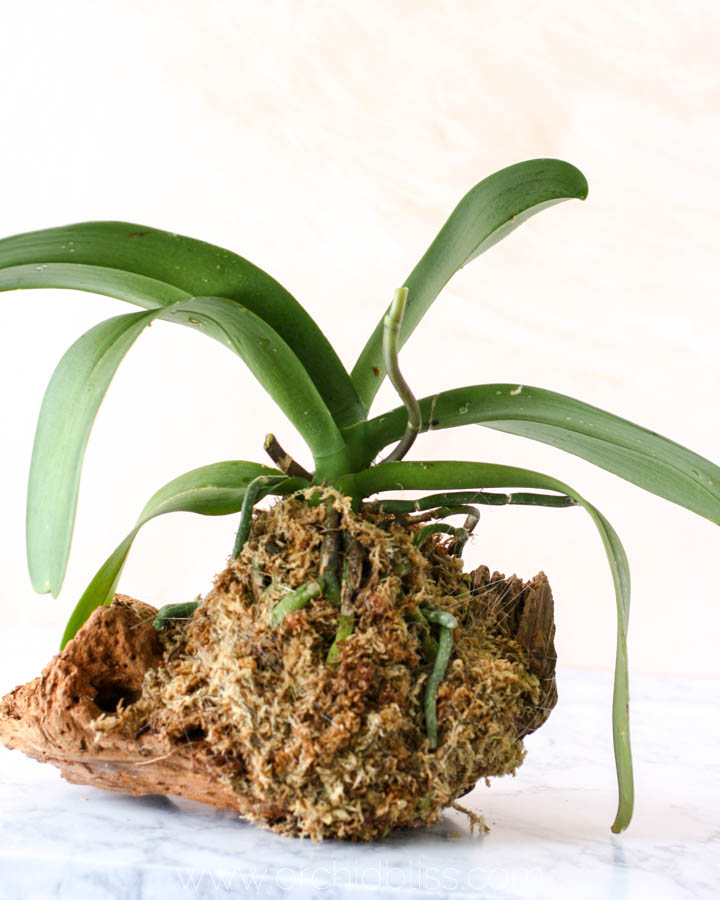
9- Secure the Orchid to the Mount
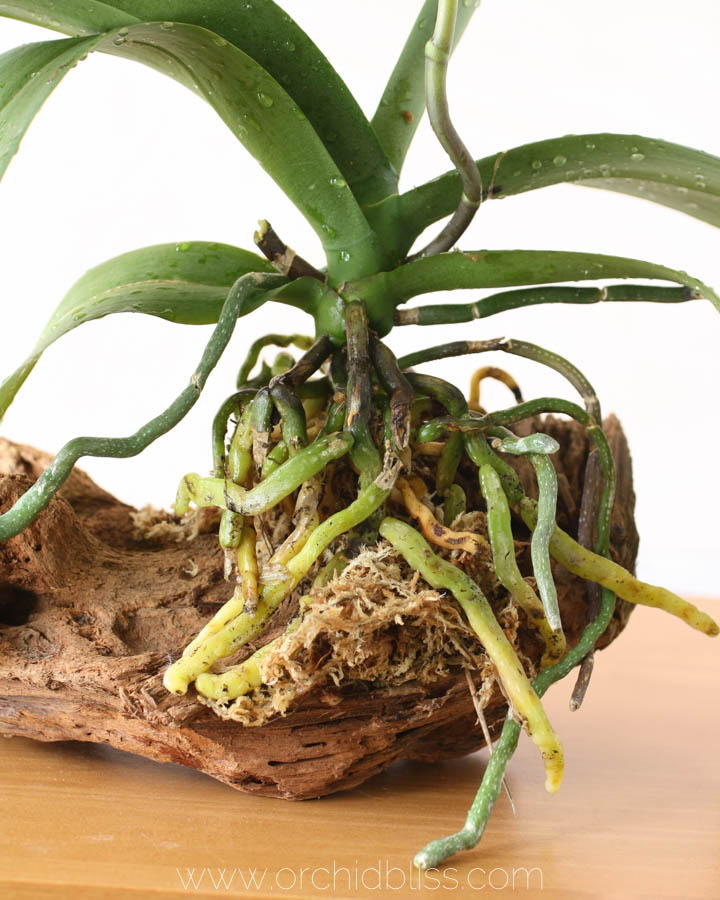
- To start, soak your orchid for about 20 minutes so that the roots become more pliable.
- Gently remove the old potting media from the orchid’s roots. Toss all the old potting media in the garbage. Using the sanitized bonsai shears, snip off and discard any dead roots.
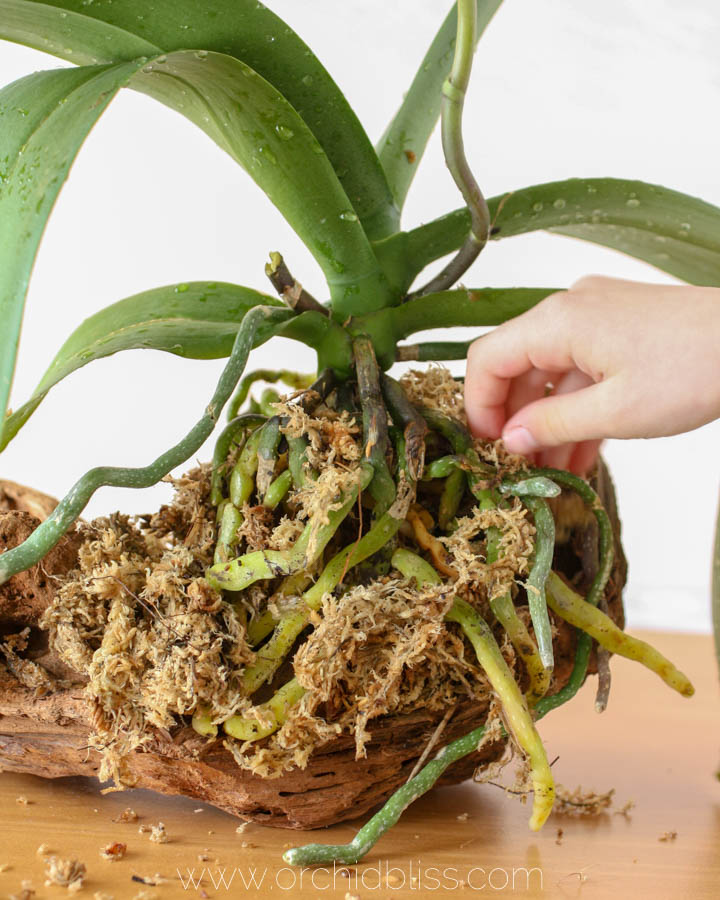
- Soak the sphagnum moss or coconut fiber in water. It takes about 20 minutes for the moss/fiber to hydrate. Gently squeeze moss/fiber to remove excess water.
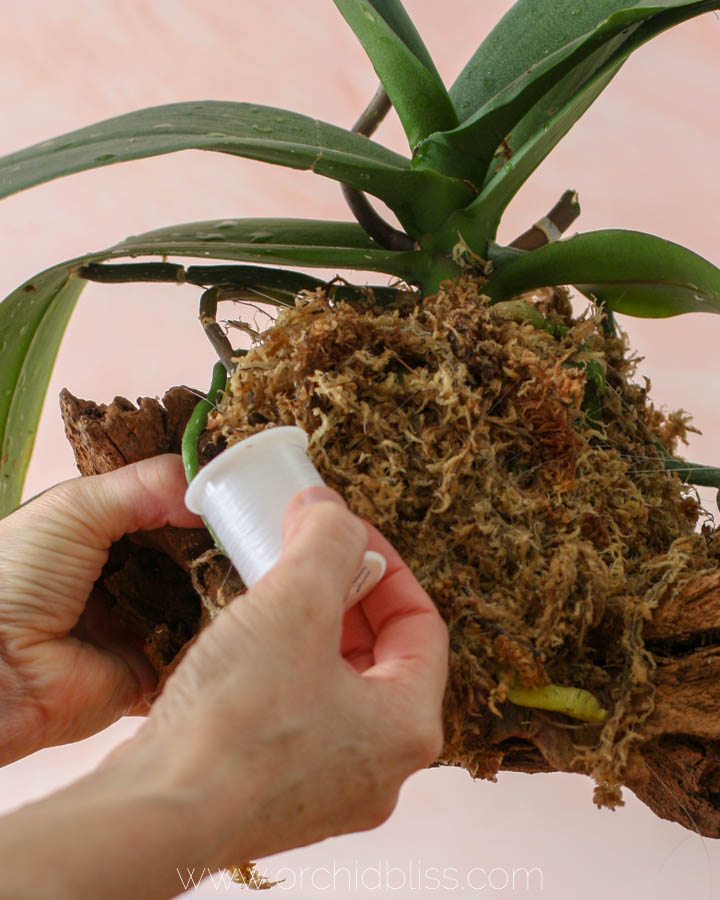
- To provide moisture to the orchid’s roots, secure a pad of the moistened sphagnum moss/coconut fiber to the mount by wrapping the fishing line around the mount and the moss or fiber.
- Spread the roots around the wood slab and cover them with a thin layer of moistened sphagnum moss or coconut fiber. For optimal placement, keep in mind the direction of the root and pseudobulb growth.
- Wrap the fishing line around the slab, moss, and orchid to secure the orchid to the mount. Use care to keep the fishing line from cutting into the roots.


10-Where to Place the Mount
Outdoor Mount Placement
If you live in a tropical/subtropical climate, you can hang your mounted orchid outside, under the shade of a tree, or even under a porch.
Indoor Mount Placement
Windowsill growers will need to hang their mounts so that the orchid gets enough light and also makes watering, a daily routine, as simple as possible.
Hang your orchid in a window where there is bright, but not direct sunlight. Hang a sheer curtain to shield the orchid from too much light. Or, if you have the opposite problem, supplement light with artificial light.
NOTE: When the orchid is first mounted, place the orchid where it is a little more shaded, then when the roots become more established, move the orchid to a brighter location.
Since mounted orchids need watering daily, be sure that the orchid is easily accessible. If the orchid is hung indoors, you can just spray the orchid down with a hose – provided that the water is at a tepid temperature. You will need to carry it to the sink and let the water wash over the roots.
11-How to Care for a Mounted Orchid
As noted above, the main difference in caring for a mounted orchid compared to a potted orchid is that mounted orchids dry out faster than potted orchids. This means that while you will need to water more frequently, it is very difficult to overwater a mounted orchid. Ideally, allow the orchid to dry slightly between watering. Still, if your orchid roots are drowning in water – mounting may be the answer.
Watering Outdoors
If you live in a climate where you can grow your orchids outdoors and the tap water is warm enough, you can give your orchids a daily spray down with the hose. If it is unusually hot, the orchids may benefit from additional watering.
Watering Indoors
If you grow your orchids indoors, then watering becomes a bit more complicated since you don’t water on the floor from the hose. Instead, if you hang your orchid, unhook the orchid and bring it to the sink and let tepid water run over the roots. To avoid clogging up your drain, it’s a good idea to use a drain catch.
If you display your orchid on a tabletop, you can water the orchid the same way that you a hung orchid. Another option is to display the mount in a saucer that will catch any runoff from the water. This is what I do. I use a narrow-spouted watering can that I use to saturate the roots. Excess water stays in the saucer. I take care not to let the orchid sit in water. Be sure that the mount is resting on something above the saucer so that the orchid roots never sit in water.
Use Fresh, Clean Water
Always take your orchid to the sink to water, or use a watering. Alternatively, the mount can be dunked in a clean bucket of clean water. If you do decide to dunk your orchids, be sure to change the water for each orchid to avoid the spread of pests and disease
Orchid Leaves and Water
Orchids like to absorb water in their leaves through the water in the air – humidity – not water from the faucet. When watering, try to keep water off the leaves to prevent bacterial and fungal growth at bay.
Orchid Roots
You may have heard that misting orchids is a good way to keep them hydrated. This is true, just remember to mist the roots, not the leaves. You can buy really nice spray bottles that with one squeeze you get a continuous mist of water. I first saw these misting spray bottles at the hair salon, then I saw them again at an orchid show vendor’s booth. They save your hands if you have trouble squeezing. I like them.
Mounted Orchids Have Higher Humidity Requirements
If you live in a dry climate, add water to the air with a humidifier set to the lowest setting. Orchids breathe in carbon dioxide and breathe out oxygen through tiny openings in their leaves. These tiny openings are called stomata. When the stomata open to release oxygen, the orchid loses water. To make up for the water lost when breathing (called transpiration) the orchid relies on humidity to make up the difference.
Besides keeping water off the leaves when watering and adding water to the air with a humidifier, another way to keep your orchid healthy and avoid fungal and bacterial infections is by adding air movement. You can do this by opening a window as weather permits, turning on a ceiling fan, or turning on a small fan pointed away from the orchids and set to low.
When to Water
The best time of day to water is in the morning. By watering in the morning, you give the orchid time to dry out a bit before the evening. Again, this will help you to grow healthy disease-free orchids.
Fertilizing Mounted Orchids
To feed mounted orchids provide them with the nutrients they need to flower and grow. Since you will need to fertilize your orchid for optimal health and vigor, you also need to know how to deal with fertilizer salts.
If you notice root tips turning brown or leaf tips drying out the mount may have absorbed too many fertilizer salts.
How to Leach Salts from an Orchid Mount
Soak the mount – orchid side up – in a bucket of distilled water for about an hour. One week later, repeat the process.
If you decide that the orchid needs to be re-mounted, use care and sterilized pruning shears to separate the orchid’s roots from the mount. Try to disturb the roots as little as possible.
Your Turn
If you have an orchid that is ready to be potted, why not give try mounting it? Just remember that it will need to be watered more frequently. Higher humidity levels are also recommended. If you aren’t hanging the orchid, set the mount on a tray. Either way, enjoy the natural appearance of your mounted orchid!
Quick Up-Date
To help you further, start by downloading my free cheat sheet to see where to cut the orchid flower spike after blooms have faded to trigger re-blooming. Click here, for the cheat sheet. It’ll be super helpful.
Related articles