How to prevent, identify & treat orchid pests and diseases
Forewarned is forearmed. To grow healthy orchids, you need to know how to prevent orchid pests and diseases from taking hold of your orchids in the first place. Then, you need to know how to identify and treat orchid pests and diseases, including fungal, bacterial, and viral infections as well as pests.
| Prevent Pests & Disease | 1. Provide air movement 2. Sterilize tools |
| Identify Pests | 1. Conduct health checks 2. Look for insects and insect damage |
| Treat Pests | 1. Use houseplant insecticidal soap 2. Repeat applications |
| Identify Disease | 1. Look for leaf spots, rot, foul odor, color streaks, and tissue collapse |
| Treat Disease | 1. Isolate orchid 2. Remove diseased portion 3. Apply fungicide 4. There is no cure for viruses |
Discover how to prevent and identify, and treat orchid pests and diseases. Then, when problems occur, discover what actions to take. The good news is that if caught early, bacterial infections and pests are usually not serious and are easy to treat.
Some of the links on this page may be affiliate links. Click here to learn more.
7 Tips for Preventing Orchid Pests and Disease
1. Buy healthy plants.
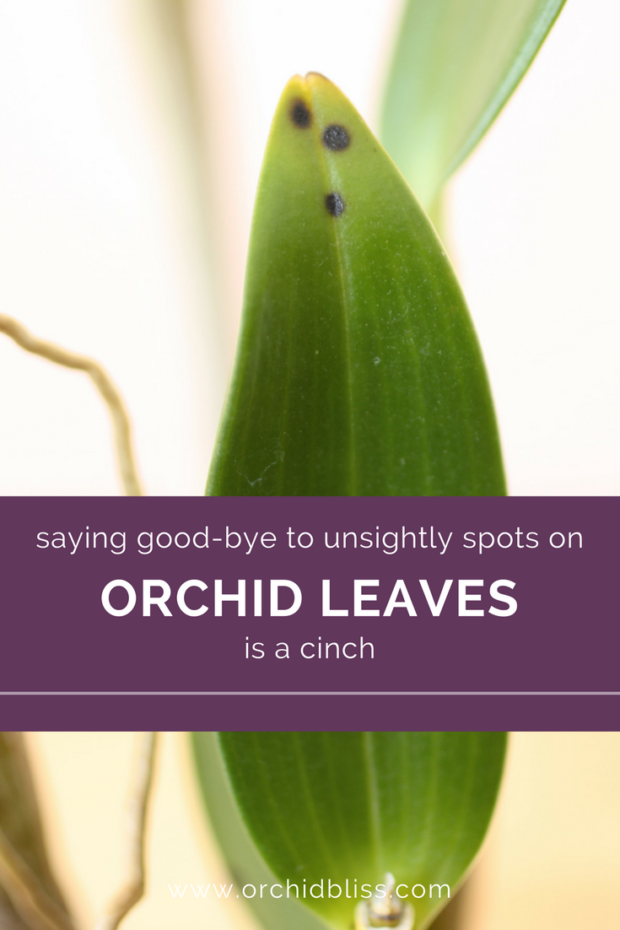
Before making a purchase inspect leaves for reddish-brown to black spots. Do not buy plants with spotted leaves (like those in the above photo).
2. Provide air circulation.
Orchids love humidity, and so do bacteria. To prevent diseases that thrive in a humid environment, turn on a fan. Air circulation will do wonders in preventing bacterial growth.
3. Avoid overwatering.
Besides killing your orchid’s roots, standing water is like sending an invitation to unwanted bacteria to come to live in your orchids.
4. Keep it clean.
Always sanitize pruning shears and other tools. Pass tools through a flame, wipe down with rubbing alcohol or dip in a bleach solution (2 parts bleach to 10 parts water). A well-maintained growing area includes picking up dropped flowers, weeding, dead leaves, dried sheaths, and other debris. Trim off old flower spikes, dead leaves, and pseudobulbs. Keep unused pots and mounts put away and floors swept clean of potting media. Empty trash regularly.
5. Frequent health checks.
Take time to regularly inspect under leaves, and around small crevices. Some insects are large and easy to see. Other pests are very small and are more easily spotted with the use of a magnifying glass. If you can catch pests and diseases in the early stages, they are much easier to control and gentler measures can be used to control the problem. A good time for health checks is when water, potting, and at the beginning of each season, making it much easier to treat orchid pests and diseases should they occur.
6. Isolation.
As an extra precaution isolate new plants for a week or two, just to be sure that it didn’t bring any hitchhikers, in the form of disease, along. This advice has saved my orchids. Sometimes we may overlook bacterial spots that somehow become glaringly obvious once at home.
7. Proper care.
Healthy plants will more easily fight off pests and disease, while weak plants are much more susceptible to succumbing to pests and infections.
| DISEASE | IDENTIFY | TREAT | PHOTO |
| Fungal | Root, rhizome, pseudobulb rot and leaf spots can all indicate fungus. | To treat fungal and bacterial infections, use sterilized pruning shears to cut away affected area. Apply cinnamon paste to lesion. For fungal infections, apply beneficial fungi or, a copper-based insecticidal soap. For bacterial infections, apply beneficial bacteria, or refined horticultural oil or insecticidal soap. |  |
| Bacterial | A spotted or sunken area where water was left sitting; a foul smell. | Treat bacterial infections as you would fungal infections. |  |
| Prevention | To prevent fungal and bacterial infections, remember three things: | 1. Use a fan. 2. Always sterilize tools. 3. Try not to overwater, which leads to rot. Rot leads to infection. | |
| Viruses | Viruses are difficult to diagnose. Still, viruses can be identified by a color break in blooms. A viruses tend to be in not on plant tissue. Watch for streaking. | To accurately identify a virus you must take a sample and send it to a commercial lab such as agdia. | |
| Prevention | Here’s how viruses are spread: the sap from an infected orchid comes in contact with a healthy orchid. | To prevent tool transmission make sanitation a top priority. To prevent insect transmission, keep insects under control. |  |
| Sunburn | Identify sunburn by leaf collapse. As time goes on the leaf will continue to deteriorate. A sunburned leaf will feel squishy. | Remove the burned leaf. Apply a cinnamon paste to the orchid where the leaf was removed. |  |
| Prevention | Keep the orchid away from direct sunlight and do not leave an orchid in your car. | – Water – Re-pot – Buy – Sterilize tools with a flame or rubbing alcohol |
Identifying Bacterial and Fungal Rot
As you will see, bacterial and fungal infections are identifiable by rot. Look for areas that are black or brown, mushy, seeping, and stinky.
Common Bacterial Infections
Bacterial Brown Rot begins with a small, brown watery blister on a leaf that quickly spreads until the entire leaf is brown and dead. If the infection reaches the crown or rhizome, the orchid will die.
Brown Rot is caused by the bacterium, Erwinia, which begins as a small brown spot on the leaf, but quickly spreads. Identify brown rot by its foul smell. If the infection reaches the rhizome, the orchid will die.
Black Rot is caused by fungi, Pythium ultimum, and Phytophthora cactorum, often has a watery appearance, and can quickly kill a plant if not treated before it reaches the rhizome or roots.
Root rot is caused by the fungus, Rhizoctonia, and attacks roots potted in decomposed or poorly draining media.
As root rot affects roots down in the potting medium it is difficult to see the rotten roots. Look for symptoms like failure to thrive – small new growths, shriveled leaves, and pseudobulbs. Take action immediately to prevent the fungus from killing your orchid.
Treat by re-potting the infected orchid and removing damaged roots. Use fresh potting media. Follow up with fungicide according to product instructions.
Common Fungi Infections
Leaf-Spotting Fungi are common and are not usually lethal. In fact, many orchid growers call it par for the course and don’t do anything except to improve general care practices like watering in the morning, providing good air movement, and keeping water off the leaves and crown. This type of leaf spotting is identifiable because it is slow-growing and will not quickly destroy the orchid. If you do decide to treat leaf-spotting fungi, use a fungicide per product instructions.
Petal Blight caused by the fungus Botrytis cinerea causes black spotting on the orchid’s flowers. Good air movement will prevent petal blight. Keep water off flowers. Remove infected flowers.
Treating Bacterial and Fungal Rot
Treatment for bacterial and fungal infections includes: removing rotted plant tissue, applying disinfectant, and improving culture practices.
Removing Infected Areas
As a precaution remove a small portion of healthy tissue, using care not to touch the infected area with shears. After making the cut, examine the tissue to make sure no infection remains. Look for any brown discoloration.
Applying Disinfectant-Fungicide
Let the cut dry, then dust with ground cinnamon. For a longer-lasting seal, mix cinnamon powder with Elmer’s glue and apply it to the wound.
Carefully clean the growing area with Physan, a disinfectant, and fungicide. As an extra precaution treat the orchid with a Physan solution of 1 tablespoon Physan to 1 gallon of water.
Always sterilize shears before and after use. If treating more than one orchid, sanitized before moving on to the next orchid. To sterilize, pass tools through a flame, wipe them down with rubbing alcohol, or dip them in a bleach solution (2 parts bleach to 10 parts water).
Improving Culture Practices
Next, here are a few ways you can help prevent future fungal and bacterial outbreaks:
- Provide constant, yet gentle air movement. Point a fan away from your orchids, and turn the fan to the lowest setting.
- Water in the morning. This way any water accumulation on the leaves will dry before nightfall.
- Use care to keep water off the leaves and flowers.
- Keep paper towels on hand to absorb water that accumulates in the crown of the plant. Pay particular attention to phalaenopsis and paphiopedilum orchids.
Identifying Viruses
This is the bad news: Viruses are microscopic and can be difficult to diagnose and almost impossible to cure. Remember, viruses are most often identified by color streaking. Keep in mind that virus symptoms copy-cat symptoms of pests, nutritional deficiencies, pest damage, fungi and heat, and cold damage. A virus may even be present without manifesting any symptoms.
At any rate, here are the symptoms of viruses:
- Color break or streaking in flowers and foliage
- Loss of vigor
- Yellow-white lesions
- Dead leaf tissue – may look like frost damage
- Leaves with stripes and rings
- Irregular twisting, pitting, and curling of leaves
Treating Viruses
The best course is to throw out such plants. If you don’t want to throw out your orchid, keep it away from your other plants. Use caution and keep all tools (watering cans, razor blades, etc.) away from the infected orchid. If you do use a razor blade, be sure to throw it out after use.
TIP: To accurately identify a virus you must take a sample and send it to a commercial lab such as agdia.
Improving Culture Practices
Since viruses are impossible to positively identify without a lab test and impossible to treat, best culture practices are a must. The following are a few things you can do to keep from introducing and spreading viruses into your orchid collection:
- Ask the seller if they regularly test for viruses.
- Sanitize all tools, including shears, pots, and surfaces. Change disposable gloves when potting multiple orchids.
| PEST | IDENTIFY | TREAT | PHOTO |
| Scale | Hard light, brown bumps that you cannot scrape away indicate Boisduval scale. | With an old toothbrush and 70% rubbing alcohol, and a pair of surgical gloves scrub every nook and cranny of your orchid. | 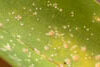 |
| Mealybugs | Cottony, web-like substance around the base of the plant on pseudobulbs, rhizomes, or on the underside of leaves | Isolate infected orchids. Spray the plant with horticulture oil. This is most effective when bugs are in the nymph phase. | 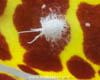 |
| Spider Mites | Not all spider mites spin webs. Because the mites are so tiny, the best indicator of spider mites is tiny indents. | Isolate infected orchids. Spray the plant with horticulture oil. This is most effective when bugs are in the nymph phase. |  |
| Aphids | Look for aphids on the most tender parts of your orchid. Look for soft-bodied green, yellow or black soft-bodied insects. | Take your orchid outside and spray off the aphids. Watch closely. It only takes one aphid to reproduce and start a colony. | 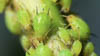 |
| Ants | Ants love honeydew which is secreted by healthy orchids. Honeydew is also excreted by aphids and mealybugs. | When you see ants, look for other pests. Otherwise, a damp cloth will clean up the honeydew and the ants will go away. |  |
| Snails & Slugs | Look at night when they come out to eat new growth – including buds and flowers. Watch for the slime trail. | Use a product called Sluggo. Sprinkle it around your orchids. The snails and slugs will feed on the Sluggo and die. | 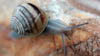 |
| Prevention | Make it a habit to check for pests when you: | – Water – Re-pot – Buy – Sterilize tools with a flame or rubbing alcohol |
Preventing Pests
As always, an ounce of prevention is worth a pound of cure: Check new plants for signs of pests before purchasing. Keep new plants away from other plants until you are sure the plant is healthy and pest free. Bugs are a huge nuisance, but you can take action against them. As soon as you notice them, begin treatment right away.
Vigilant surveillance is vital to preventing an infestation of pests.
Identifying and Treating Pests
Just the word scale gives me a shiver of distaste! These little beasts can easily spread throughout an entire collection if you’re not careful. The first step is always prevention. Then you’ll need to know how to identify pests and know how to treat pests to get rid of them. If you notice any sort of pest, immediately remove the orchid away from the rest of your orchid collection.
Aphids
Look for aphids on the most tender parts of your orchid, especially news growths. Aphids are soft-bodied green, yellow, or black insects. As a sucking insect, their greatest threat is that they may spread disease, particularly viruses between plants.
To treat aphids take your orchid outside and spray off the aphids with a strong stream of water. Watch closely as it only takes one aphid to start a colony. Check your orchid regularly to be sure the aphids are not making a reappearance.
Mealybugs
If you notice a cottony, web-like substance around the base of the plant on pseudobulbs, rhizomes, or on the underside of leaves you may have mealybugs. Another tip-off is the presence of ants. Mealybugs excrete honeydew that attracts ants.
Here’s how to treat mealybugs and scale in 3 steps:
- First, isolate these orchids from the rest of your collection.
- Second, spray the plant with horticulture oil. This is most effective when bugs are in the nymph phase.
- Third, with an old toothbrush and 70% rubbing alcohol, and a pair of surgical gloves scrub every nook and cranny of your orchid. This may seem overwhelming when you first look at your orchid, especially if your orchid is large, with lots of leaves and pseudobulbs, but you can do it. Once you get started, it’s not so bad.
Additional Measures to Treat Mealybugs and Scale
I recommend pouring a small amount of rubbing alcohol into a dish so that you can easily dip the toothbrush into the bowl without contaminating the rest of the alcohol.
Keep the toothbrush and alcohol on hand so that you can repeat the process every 10 days, or sooner if you see signs of the bugs. After the scale has been treated the hard shells will dry up and easily flake off, though a scar will remain.
Scale
Scale, particularly armored or Boisduval is considered the worst of orchid pests. Unlike mealy bugs, you can’t simply use your fingers to brush the scale away. The scale has a thick detached shell that is practically cemented to the orchid. Look on leaves, and all around the base of the plant, for signs of this pest. These insects can be difficult to get rid of because they hide in every imaginable nook and cranny. Repeated treatment is recommended.
Identifying scale: Hard light, brown bumps that you can not scrape away indicate Boisduval scale.
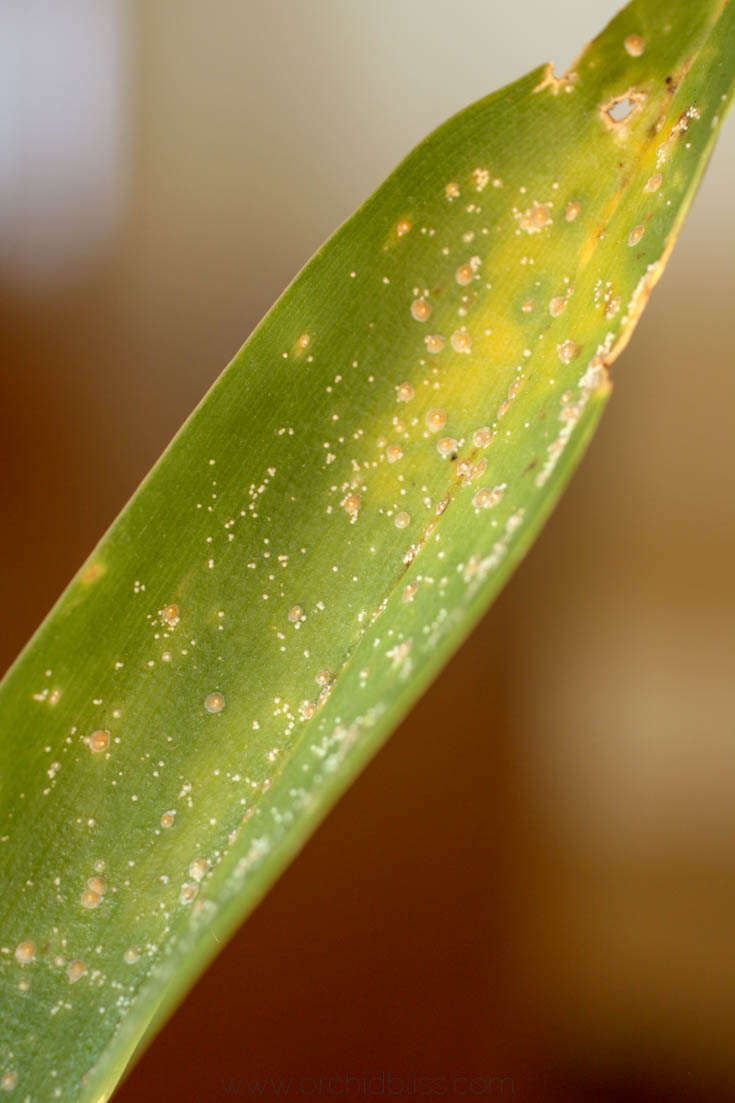
Treat scale the same way you would mealybugs.
Snails and slugs
Nighttime is the best time to catch snails and slugs in action. A slime trail is an instant giveaway that snails and slugs are present. Flowers, buds, and other new growth are most vulnerable to snails and slugs.
To treat snails and slugs use Sluggo, a reportedly safe product. Just sprinkle it around your orchids. The snails and slugs will ingest the Sluggo and die.
Spider Mites
As not all spider mites spin webs, the best indicator of these pests are tiny stippling marks on your orchids’ leaves. Spider mites are very tiny and are not easily seen. If you need to, use a magnifying glass to look for these pests.
To treat spider mites, isolate infected orchids. Spray the plant with horticulture oil. This is most effective when the bugs are in the nymph phase. After treatment, keep a close eye on your orchids to be sure the mites have been eradicated.
Thrips
If you notice dry edges on the flowers, or flowers that have difficulty opening properly along with root damage, your orchids may have thrips.
Thrips are truly beastly as they are hard to control. The most effective way to treat them is with repeated applications of insecticide. If you have repeated thrips infestations, regularly flush flowers and leaves with water.
What to Do If You Think You May Have Pests Feasting On Your Orchid’s Roots
If you suspect that pests are down in the orchid’s roots and potting media you can safely pour hydrogen peroxide into the potting mix. As this will dry out the roots, be sure to water thoroughly afterward.
Now you know how to treat orchid pests and diseases. I have confidence that you’ll be able to with the tools we’ve talked about you’ll be able to successfully eradicate these common pests and diseases.
Helpful Critters
There are many helpful friends that feast on pests, such as lizards, toads, and frogs. In addition, don’t overlook the option to purchase predatory mites, midges, and parasitic nematodes that can be extremely helpful in controlling unwanted pests.
Prevent Identify and Treat Sunburn
Along with learning how to treat orchid pests and diseases, it is equally important to know how to prevent, identify, and treat sunburn. Otherwise, you may think your orchid has a disease when the leaf damage should be properly attributed to sunburn.
How to Prevent Sunburn
Use care not to expose the orchid to the possibility of sunburn. If you suspect sunburn, move your orchid further away from the window or light. Never leave your orchid in your car.
How to Identify Sunburn
Sunburned orchid leaves result in destroying the leaf tissue. At first, the leaf will just feel squishy. Over time, the least will continue to deteriorate and the leaf will turn from green to brown, and, eventually, black.
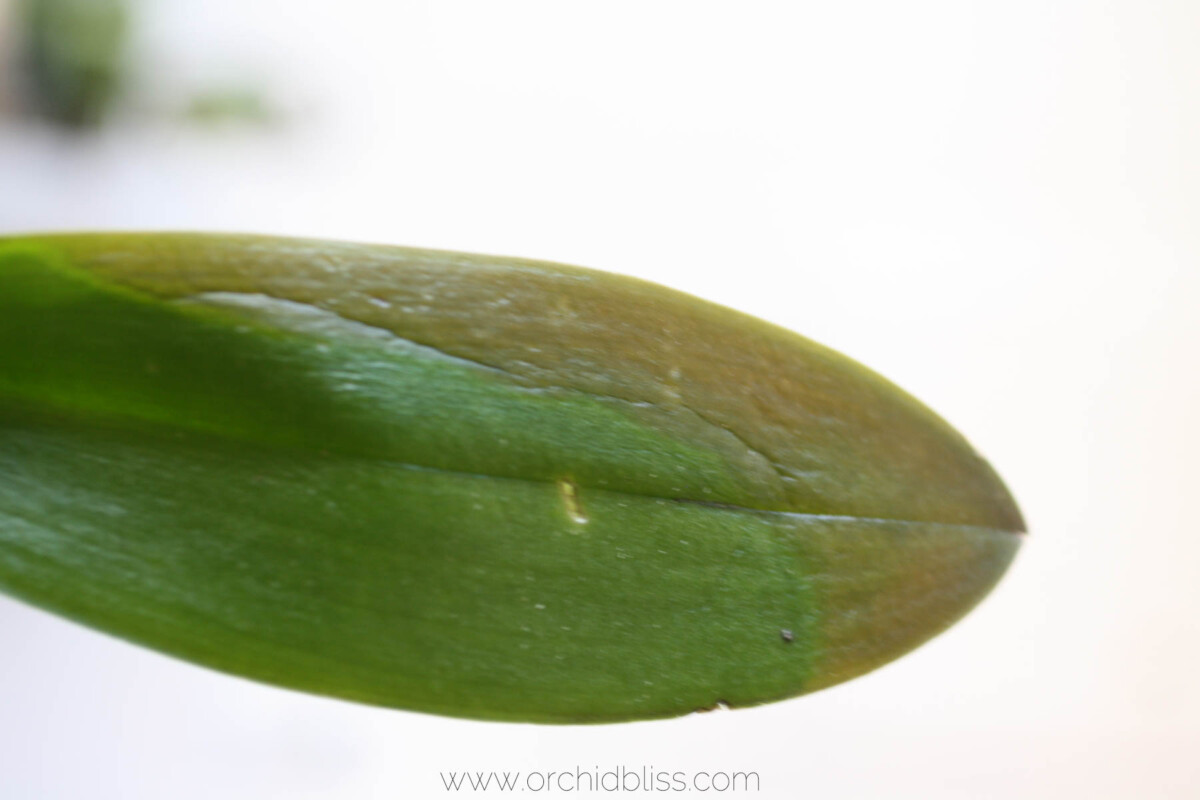
How to Treat Sunburn
The best course of action is to remove the sunburned leaf with sterilized shears or a single edge razor blade. Apply a cinnamon paste to the lesion.
Caring for Your Sick Orchid
If you have an orchid that has been weakened by pests or disease it will need some tender loving care.
Begin restoring your orchid to good health by first removing the flower spikes. I know this may be painful, but flowering expends a lot of energy that will be better spent on recovery.
To help you further, download my free cheat sheet to see where to cut the orchid flower spike after the blooms have faded to trigger re-blooming. Click here for the cheat sheet. It’ll be super helpful.
Next, check out the root system. If it is in good shape – that’s excellent news. Otherwise, remove dead roots with sterilized shears. If fungal problems have plagued your orchids, dust the roots with ground cinnamon.
RePot If Root System Is Damaged
Repot your orchid with a fresh potting mix such as sphagnum moss. This is a good potting choice for rehabilitating orchids with extensive root loss. Sphagnum moss is highly absorbent and can be kept damp. Additionally, sphagnum moss, when fresh, has some natural antibacterial and antifungal properties. If re-potting with sphagnum moss, be sure that the moss is wrapped loosely, yet securely around the roots.
The next step is to move your orchid to a more shaded location and increase humidity. An easy way to increase humidity is to make a mini-greenhouse by placing a large, clear plastic bag over the top of the orchid.
Reduce Water – Increase Humidity – Stop Fertilizing
While in recovery, reduce water to the roots, increase humidity, and wait to fertilize until the orchid has initiated new growth – particularly roots. Continue to be on the lookout for a resurgence of pests or diseases.
Prevent, Identify and Treat Orchid Pests and Diseases for Healthier Plants
These three keys: prevent and identify, treat orchid pests and diseases all work together to help you grow healthier orchids. When you do notice a problem, act quickly. And above all, good clean orchid culture is the best thing you can do to prevent problems before they occur. Don’t let the inconvenience of sanitizing your orchid’s grow space and tools keep you from growing robust orchids.
Related Articles