
Orchids have needs that are unlike any other house plant you’ve had before. These enigmatic flowers have an extremely sensitive root system that needs accurate and precise care.
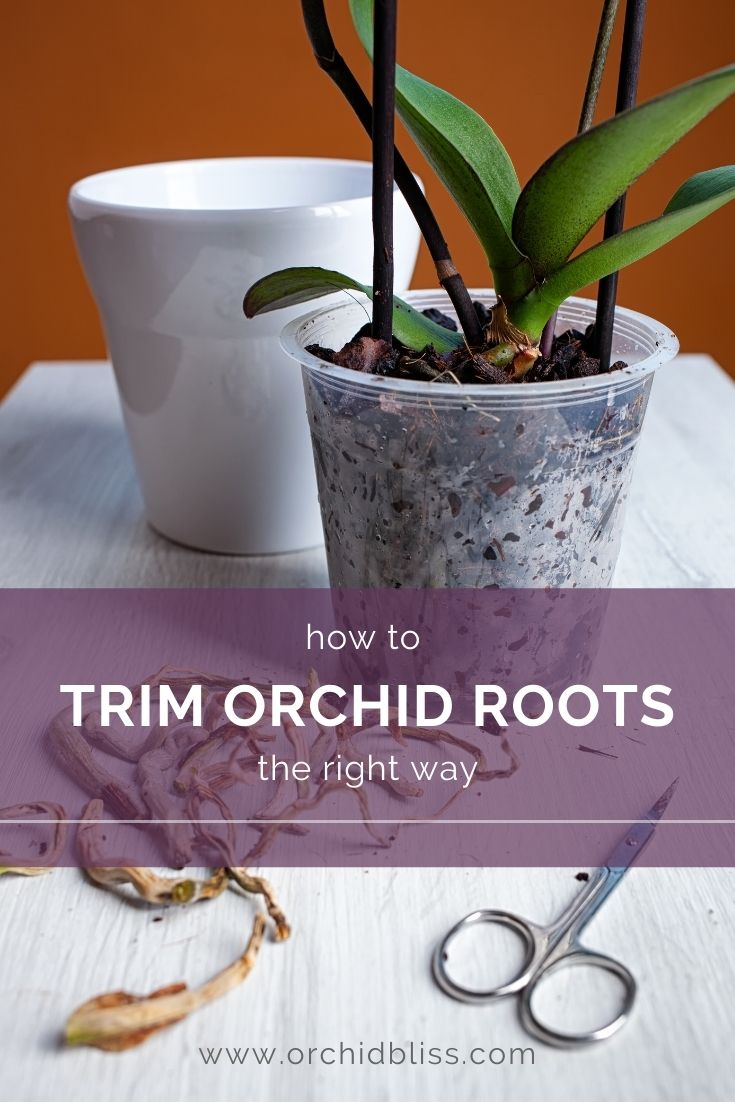
Trimming orchid roots require special care and a delicate hand. The key to trimming orchid roots is to have clean tools, make precise cuts, and care properly for the orchid afterward. Roots should be disposed of once removed, especially if the orchid was sick.
Trimming orchid roots is a precise practice, but it shouldn’t scare you away. Read on to learn everything you need to know about properly trimming an orchid’s roots and how to best care for your plant afterward.
Some of the links on this page may be affiliate links. Click here to learn more.
Tools Needed to Trim Orchid Roots
You’ll need certain tools to trim and care for your orchid. Make sure you have the following on hand before you start chopping off parts of your precious plant.
Sterilized Trimming Scissors
Vital to trimming your plant and keeping it healthy is a pair of sterilized trimming scissors. Gardening-specific scissors are ideal, but household scissors are fine too, as long as they are sharp and sanitized.
The Koshiji Petit Cut Hand Pruning Shears are perfect for trimming orchid roots. The sharp blades make for quick cuts that minimize stress to your plants, while the straight shape makes it easy to reach in between the orchid’s complicated root network.
Make sure that you sterilize your scissors before cutting any part of your plant. This sterilization will prevent cross-contamination of diseases from other plants in your collection. A cut root or stem for a plant is equal to a wound on human skin: it’s easy for an infection to enter the injured area while it is open.
Spray Bottle
A plastic spray bottle is essential for an orchid owner. You’ll get more use out of this item than you think! A spray bottle will help provide your orchid with the necessary moisture and humidity while growing. In trimming your orchid, it will provide you a way to apply disinfectant to your plant’s vulnerable roots.
All you need is a simple plastic bottle like the Continuous Water Mister, and you can use it for many functions in your home garden. I especially like this one because you don’t have to pump the handle for a continuous mist.
Disinfectant
You’ll disinfect a plant’s roots after cutting them like you would disinfect a cut on your hand before bandaging it. Effective and cost-efficient is a simple water and hydrogen peroxide solution that you can mix at home as you need it.
McKesson Antiseptic Hydrogen Peroxide 3% is a no-nonsense product that, when diluted in water, effectively sterilizes snipped orchid roots before replanting.
Chopstick or Butter Knife
While not necessary for the actual root trimming, having a chopstick or butter knife on hand will make removing your orchid from its pot much easier.
Potting Mix
Keeping extra potting soil on hand is also good if you need to top the pot up after trimming roots.
Trimming Orchid Roots When Repotting
Are you planning on repotting your orchid? Have you checked first for the necessary signs?
Tightly Tangled Roots
An orchid should be repotted when the roots have nearly overtaken the pot that it is in. Having an orchid in a clear plastic container is beneficial for this, as you can keep an eye on roots’ development. When there seem to be more roots than soil in the pot, the plant will need more nutrients soon.
Roots Pushing the Plant out of the Pot
Orchids prefer to have tightly-bound roots, but sometimes, the roots are so long that they begin to push the plant out of the pot. Take this as a good sign – it means that your orchid is healthy and growing rapidly. It also means that it’s time to re-pot.
TIP: Don’t confuse roots growing out of the top of the pot as the plant being pushed outwards. These reaching roots are, in fact, air roots. They are perfectly normal and show your plant is flourishing. We’ll explore these more later.
Orchid Has New Growth Forming
If your orchid has new growth, either in the form of new roots, buds, or leaves, it’s a good sign that your plant will need to be repotted soon. Preferably, wait until one of the above signals is present as well. You’ll know for sure then that your plant is healthy and ready for a new home!
Trimming Roots When Repotting
Once you’ve made sure it’s time to repot your orchid, you can go ahead and do so. After using your chopstick to widen the space between the soil and the container, your plant is in, gently grip the orchid’s stem and remove the specimen.
Holding your orchid in the air, take a look at the root ball for any unhealthy roots. You may need to loosen the root ball to see all of the roots; this is completely fine. No harm will come to your orchid from loosening the root ball; it can help your orchid find a better grip in its new pot.
With your clean gardening shears, remove any roots that are not healthy. These unhealthy extensions include brown roots, black roots, and mushy or brittle roots. Green, white, or yellow roots are all healthy and should be left alone.
Once you’ve trimmed your plant, spray the cuts with the hydrogen peroxide solution. Give the plant about 10 minutes to dry, and then re-pot it. Water your orchid soon after repotting to encourage growth and provide the trimmed roots with nutrients so they can heal.
Trimming Orchid Air Roots: Should You Do It?
Many orchids will develop something called “air roots.” These roots reach out from the container into the air. They may look like unruly straws that need to be trimmed, but these are very important appendages in the orchid’s growing process.
In the wild, these roots reach out along the surface of trees where the flowers often grow. The roots wind under and out of moss and bark, giving the plant a greater hold. The roots also absorb important nutrients and moisture from the air, allowing the plant to feed without traditional dirt.
If your plant’s air roots are white and firm, they are healthy. Do not trim these roots. However, if the roots are shriveled or look rotten, they are not healthy roots. These should be removed. Note that if your plant’s air roots aren’t well, there is a good chance the other roots aren’t well either.
Trimming Dead Orchid Roots
When repotting your orchid, usually once every year or two, you may find that some of the roots are not very healthy. You should remove these roots before returning your plant to its pot. With your sanitized shears, trim dead roots about an inch above the point where they have begun to die. This trimming gives the plant a chance to regrow healthier roots once replanted.
Dead orchid roots might appear in a few different ways.
- Brittle roots. If you notice dry and brittle roots, these are most likely dead. They will often be wrinkled like they’ve dried up. Yellowish color is not uncommon here as well.
- Black roots. Black roots are definitely dead. There is no hope of saving them, and they probably have an infection of some sort. These roots must be removed before you repot your plant, or you risk losing your orchid altogether.
Trimming Rotted Orchid Roots
If any of your orchid’s roots are rotten, it’s necessary to get rid of them as soon as possible.
Look for brown, black, squishy, or spotted roots. All rotten roots will need to be removed for your plant to survive. This could be almost all of your plant’s roots, depending on the severity of the infection. It’s more likely your plant will die if you re-pot it with rotten roots than with no roots at all.
To trim rotted orchid roots, follow the steps below:
- Loosen the space between the soil and the pot.
- Gently remove the plant from the pot.
- Remove all existing soil from the root ball.
- Cleanly cut off all rotten roots.
- Lay the plant down to dry on a sterile paper towel.
- Disinfect the plant pot with a sterilizing solution.
- Dispose of all contaminated soil and roots in the garbage.
- Line the pot with fresh soil and repot the plant.
- Water newly potted orchid and keep moist.
Be very careful when trimming these extensions so that you don’t contaminate any other plants in your home or garden with the bacteria from the rotted roots. You must discard the contaminated materials in the garbage or place them straight into your organics collection bin. Keep them away from your garden or compost, as the infection can continue to spread there.
Discover more about keeping your orchid’s leaves and roots healthy by grabbing your free cheat sheet. Click here to grab your cheat sheet to learn how to grow healthier orchids. It will be super helpful.
Trimming Vanda Orchid Roots
Vanda orchids are a large group of orchids originating in Asia. These orchids love sun and humidity, and most don’t need soil to grow. These orchids are usually epiphytic, meaning they can live on a tree’s surface, collecting nutrients from the air instead of the ground.
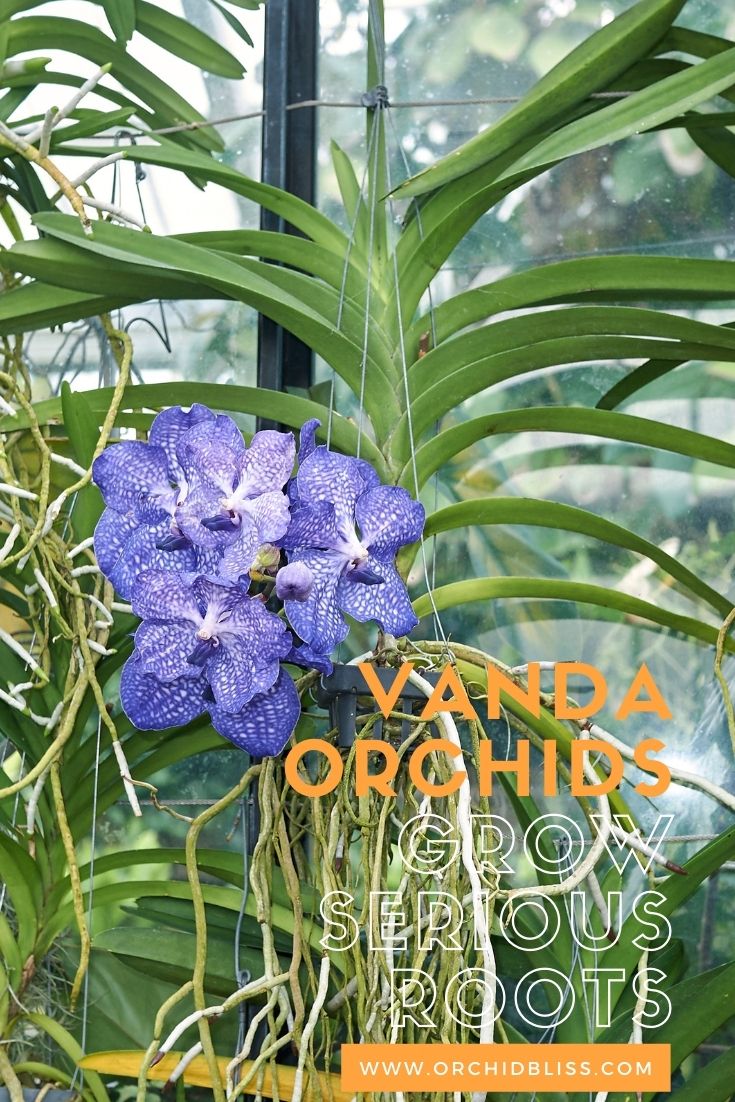
Vanda orchids are famous for having unruly roots that are hard to contain. You may want to trim your vanda orchid’s roots simply because they are getting out of hand. While it’s not advisable to trim them simply for appearance, you can cut these roots safely if they are brittle or black.
Dividing Your Vanda Orchid
If your vanda orchid is simply too large, you can divide the plant at the roots. Not only will this shrink your plant, but it will create a new vanda orchid you can keep or give to a friend!
To divide your vanda orchid, you’ll need to remove it from its container. You’re likely growing your vanda orchid in a slatted basket or wooden container of some kind. You may have to gently unwind your orchid’s roots to get it out of the basket.
If the plant’s roots are extremely intertwined in the basket, do not attempt to force them out. You’ll have to divide the orchid above these roots, as disturbing them could greatly injure your plant.
Locate the bottom of the stem, whether your orchid is in the basket or out of it. Follow up the stem until you’ve passed three outreaching roots. Cut the plant stem clean above this point, and separate the two pieces.
The bottom part of the plant could be repotted or left in the basket if it was intertwined. The top part of the plant can also be repotted or can be divided again. Ensure that each division of the orchid has two or three roots growing out of the section before you cut it off.
Trimming Dead Vanda Orchid Roots
When dividing or repotting your vanda orchid, removing any dead or dying roots is important. Like other orchids, these roots will appear brown, black, or spotted. They could feel mushy, soft to the touch, or very brittle. These roots need to be removed and safely discarded before you repot your plant.
TIP: If you are dividing your vanda orchid, remove all dead roots before performing the division. This will ensure that the separated pieces of the plant only have healthy roots attached.
Trimming Phalaenopsis Orchid Roots
Phalaenopsis orchids are one of the most common orchids to grow at home. Of the orchid family, they are one of the easiest types to care for. Most novice phalaenopsis owners will be confused at the sight of their plant’s first air root: that odd, squiggly branch that reaches out from the pot, appearing to be lost.
Many first-time-orchid-owners instinct to cut off this reaching root, sure that it is not doing the plant any good. However, as we’ve learned, air roots are vital to a plant’s success in growing.
Phalaenopsis orchid’s roots should only be cut when they are sick or infected. Never cut an orchid’s roots when the plant is healthy, and leave their air roots out and wandering.
Trimming Healthy Orchid Roots
The roots of the orchid are particularly sensitive. They should be disturbed only when your plant is healthy and asking to be repotted or when your plant is sick and needs care. You should never trim a healthy orchid’s roots unless you are safely dividing your plant as with the vanda orchid.
Caring for an Orchid After You’ve Trimmed Its Roots
As we’ve seen in this article, there are many reasons why you might need to trim your orchid’s roots. Whatever the reason, the step after trimming is as important as the act itself.
Cutting off an orchid’s roots is like opening a wound. The sliced appendages are extremely sensitive and prone to infection. To minimize the chance of contamination, you must sterilize the wounds before submerging the plant in the potting mix.
The 3% hydrogen peroxide you have on hand is essential in this step. Mix one tablespoon (14.8ml) of hydrogen peroxide with one cup (250ml) of water. Spritz the trimmed roots of the plant generously with the mixture to ensure the disinfected comes in contact with the “injured” roots of the plant.
Next, let the plant sit on a clean paper towel for five to ten minutes until the peroxide is dry. If your orchid is fighting root rot, you may want to make the solution above in a bowl and fully submerge your plant’s roots into the mixture. This is to ensure the entire infection is treated before repotting your plant.
Once the affected roots are dry, repot your plant into a fresh potting mix. Give your orchid a drink, and continue to spritz the roots daily for two weeks; this will help stimulate new growth and help your orchid regain its strength.
What Not to Do When Trimming an Orchid’s Roots
Let’s take a look at some things you should never do while trimming an orchid’s roots.
- Trim healthy roots. Healthy roots are vital for an orchid’s survival. It’s difficult enough to grow an orchid at home, don’t make it harder on yourself by cutting off your plant’s healthy growth.
- Trim air roots. Air roots allow your plant to get moisture and nutrients from the air. If your orchid comes down with a case of root rot, there is a chance the air roots could keep it alive.
- Place open roots in contaminated soil or container. Your plant’s freshly cut roots are very susceptible to infection. Ensure both the soil you’re using and the pot you’ve chosen are clean and have no pests or bacteria in them.
- Apply cinnamon to your orchid’s roots. While the jury is still out on cinnamon being a natural antibacterial, it’s confirmed that it is extremely drying. Cinnamon could help your orchid’s roots close up, but it would also sap all of their precious moisture and likely kill your plant.
Summary
Orchids are mysterious and beautiful plants. They reward hard-working gardeners with beautiful blooms that last for months and can occur twice a year. When caring for your orchid, take extra care with its roots. Always use sanitized shears, remove contaminated soil, and sterilize the trimmed roots before repotting your orchid.
Sources
- ScienceMag: Orchid’s Dazzling Diversity Explained
- Inside Science: The Secrets of Orchid Genetics
- North American Orchid Center: Orchid Science
- AOS: Vanda Culture Sheet
- Wikipedia: Epiphyte
- AOS: Novice Phalaenopsis Culture Sheet
- Frontiers in Plant Science: Floral Induction and Flower development of Orchids