For optimum health, repot your orchid every 1-2 years. Come learn how.
Repotting an orchid is necessary for optimal orchid health. It is a chance to exchange a decomposed and salt-saturated potting mix for a top-grade potting mix. Every one to three years is a good time to repot an orchid.
How to Re-Pot an Orchid:
- Start by looking for new growth – your cue to repot
- Next, select a pot based on the orchid’s root volume & growing environment
- Always use high-quality potting media
- Then, gently unpot the orchid
- Carefully inspect & clean the roots
- Finally, work in the orchid’s roots & the potting mix
Knowing how to repot an orchid is an important part of orchid care. In this step-by-step guide, I walk you through the whole process.

Some of the links on this page may be affiliate links. Click here to learn more.
Improper watering often causes a host of problems, resulting in an unhealthy orchid. To avoid these pitfalls, download the free cheat sheet that will help you prevent limp, leathery leaves and rotten roots. Click here to grab your cheat sheet to learn how to grow healthier orchids. It will be super helpful.
Determine If It’s Time to Re-Pot Your Orchid:
- Avoid root damage by re-potting before the potting medium breaks down. As the wood chips begin to decay and break down, you will see fine pieces of wood float to the top of the water. Decomposing wood is easy to identify because it looks suspiciously like coffee grounds. Remember, the best practice is to re-pot before the potting media breaks down.
- The ideal time to re-pot orchids is when new growths, especially roots, appear – usually in the spring. Take extra care not to break the new roots.
- If possible, wait to re-pot until the orchid has finished flowering and the blooms have all dropped. Why ruin a good thing? You risk losing flowers if you re-pot too soon.
- If an orchid is climbing out of the pot, re-pot. Sympodial orchids grow along a horizontal rhizome. When the rhizome extends over the edge of the pot, and new growths, roots, and pseudobulbs grow outside the pot, the orchid has outgrown the pot.
- Re-pot right away, regardless of new growth if potting media has decomposed or if salts are too high.
Gather Your Materials
If you have determined that the time is right to re-pot your orchid, here is a list of materials you will need:
- Old newspapers to lay over the workspace, to make cleanup easier.
- A bowl with tepid water to soak the orchid in to make the roots more flexible.
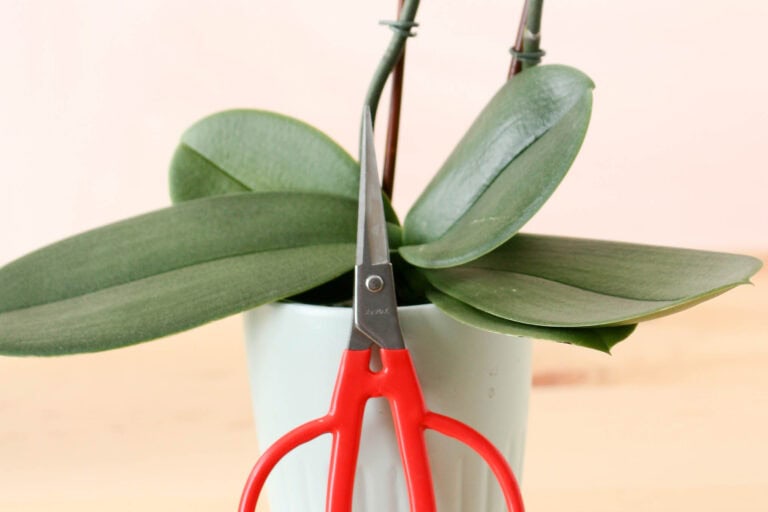
- Sterilized pruning shears. Thoroughly clean scissors down with rubbing alcohol to sterilize, or use a butane torch to sterilize. Pass the ends of the shears through the flame.
- Snug-fitting garden gloves.
- A pot for the orchid. More information is below on how to choose the right orchid pot, including size.
- A wastebasket to collect the old planting media.
- New potting media. More information is below on choosing the right potting media for your orchid.
- Additives to customize the potting mix to make it more water retentive or draining. Again, see below for more information.
- A chopstick to fill in air voids.
- A rhizome clip to secure the orchid. More information is below.
- Pencil and label.
- A cloth or paper towel for easy cleanup.
Choose the Orchid Pot
Select a Pot That Is Not Too Big
Orchids like to be crowded in their pot. If you do re-pot in a larger pot, use one that is only slightly larger. The orchid will not re-bloom as well, if at all if the pot size is too large, and with orchids, it is all about the flowers! A mature plant can continue to live in the same pot indefinitely, though seedlings may require yearly repotting.
Orchid Pots Should Have Plenty of Drainages
Another reason to underpot orchids is for drainage. If the pot is too large, the center of the pot will remain damp and stagnant. Orchids grow best in free-draining, open-potting mixes. Additionally, a pot that is too large will prevent air from reaching the roots.
Always choose a pot with drainage holes. At a minimum, the pot should have a drainage hole at the bottom. Many orchid pots, both clay, and plastic have side holes or slits.
Clean is King
The day before you plan to re-pot your orchid, sterilize your pot to prevent passing on fungal, bacterial infections, and pests. Use hot soapy water to clean the pot. Then, soak the pot in a bleach solution using 1 part bleach to 10 parts water for at least 20 minutes. Rinse and soak your pot in fresh, clean water. Next, allow the pot to dry. If using a clay pot, bake pot for 2 hours at 400F / 204.4C.
Root Volume Determine Pot Size
The pot should fit the volume of roots – not the height of the plant or the amount of foliage. This can be a little tricky when assessing the height of a graceful dendrobium, but remember. It’s the roots, not the leaves, that dictate the size of the pot.
If the orchid is growing and the roots have filled the pot, choose a pot about an inch or two larger.
If many roots have died and the root system is small, adjust the pot size accordingly.
Growing Environment and Pots
If you live in a humid climate, clay pots can be a good choice as clay pots dry out more quickly than plastic pots. If your orchids tend to dry out quickly, opt for plastic pots.
TIP: Plastic pots can be unstable because they are so lightweight. One workaround is to add weight with stones or pieces of broken pot. (Which you may have on hand if you had to break your orchid out of its clay pot.)
Select Potting Mix
There are many types of planting media to choose from. Everything from sphagnum moss to Monterey Pine bark to coconut fiber, horticulture charcoal, perlite, aliflor, Hygroton or LECA (lightweight expanded clay aggregate), pumice, and rock wool can be used as planting media for orchids.
I like to use a premium orchid potting mix sold by rePotme. When potting phalaenopsis orchids, I increase moisture retention by adding a couple of squares of wool rock.
Why Monterey Pine Bark?
- Closely replicates natural epiphytic growing habits.
- The slow rate of decay
- pH stability
- Hard texture
- Easy to customize with other materials: horticulture charcoal, large perlite, LECA, wool rock
Customize Monterey Pine Bark with Other Materials
- Do you need your orchid roots to dry out more quickly? For a more open mix, add horticulture charcoal.
- Do you need a barely damp potting mix? To retain moisture, add wool rock, and sphagnum moss.
NOTE: use a high-quality sphagnum moss labeled, long-fiber, or 5-star.
Use This Chart to Choose the Correct Potting Media Components
| COMPONENT | PROPERTIES | PHOTO |
| Bark | Fir and Monterey bark is the most commonly used potting media for orchids. It is long-lasting, porous, and free-draining. | 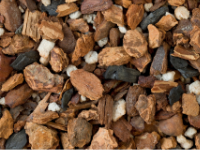 |
| Clay Pellets (LECA, Aliflor, Hydroton) | Clay pellets are commonly added to mixes to prevent compaction and add drainage. Must be leached as it absorbs salts. | 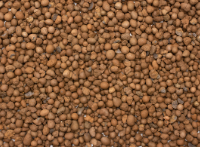 |
| Coco Fiber & Coir | Coco fiber products are water retentive, yet have good aeration. | 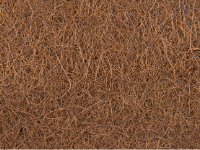 |
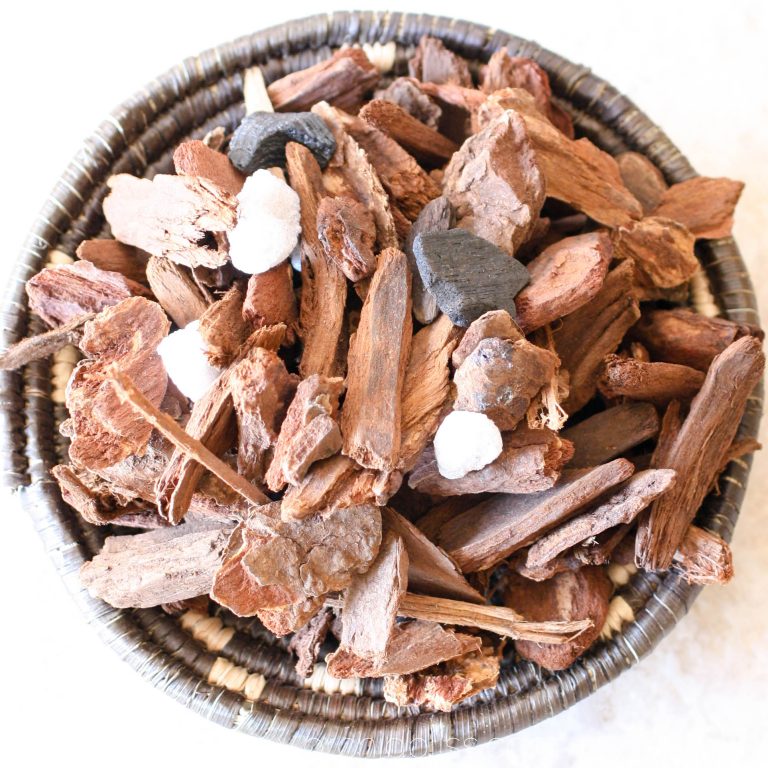
| Cork Oak Chips | Cork is sustainable, does not absorb water, is free-draining and is long-lasting. | 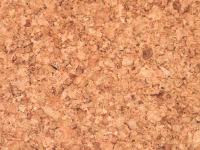 |
| Horticulture Charcoal | Use as an additive to decrease moisture, increase drainage. It is a natural filter for impurities such as salts. |  |
| Lava Rock | Does not decompose, adds aeration, but must be leached as it does absorb salts. | 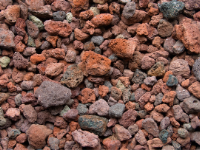 |
| Peat | Is used as an additive to increase water retention. Superior to Coco fiber products. |  |
| Pumice | Used as an additive, volcanic origin, adds drainage. Similar properties to clay pellets. | 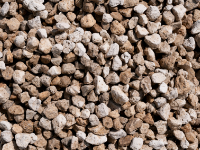 |
| Sphagnum Moss | Use the highest quality available, Very absorbent. Must leach as it does absorb salts. | 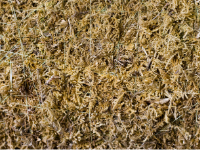 |
| Sponge Rock (Perlite) | Primarily used as an additive to increase aeration. Volcanic glass. | 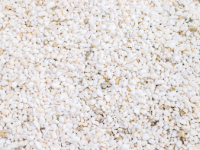 |
| Wool Rock | Used as an additive to increase water retention. Is make of spun glass. Use gloves, Is not addractive, so bury it in the mix. | 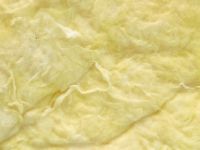 |
Roots Determine Potting Mix
Orchid potting mixes come in sizes from coarse to medium, to fine. Orchids with thick roots grow best in coarse potting mix and finer roots do best in finer mixes.
Generally speaking semi-terrestrial orchids such as paphiopedilum, Phragmipedium and cymbidium prefer finer mixes, with particles about ¼-inch.
Medium-sized particles of about ½-inch are great for many popularly cultivated orchids like phalaenopsis, oncidium, cattleya, and dendrobium.
Vanda orchids are often grown without a potting mix, but if you do add a mix, use a coarse mix with 1-inch-sized particles.
How to Re-Pot an Orchid in 7 Steps
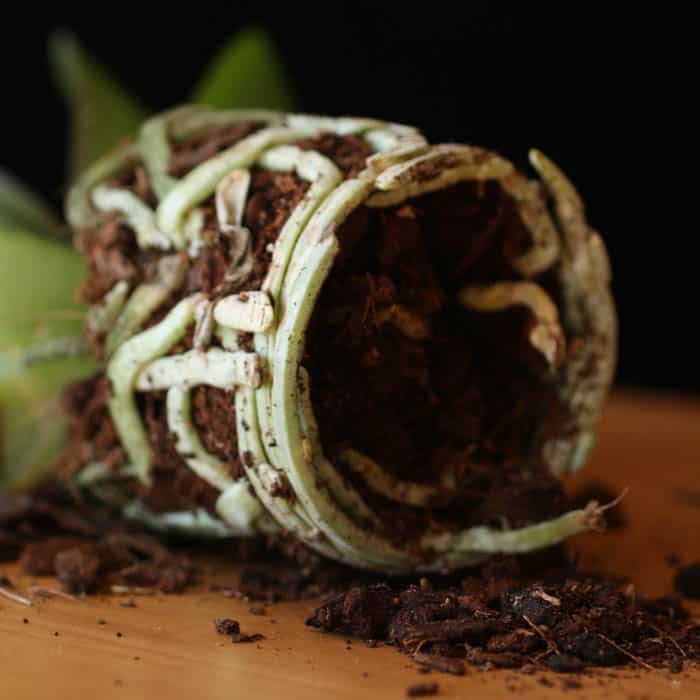
1- Begin by UnPotting
To make the roots more pliable, soak the plant for about 5 minutes in water. Then, ease the plant out of its pot. Orchids can become very attached to their pots, and removing them can be a little tricky.
Orchid roots will cling to clay. You may have to break clay pots or cutaway plastic pots if the roots cling too tenaciously. A disposable razor blade is useful for detaching roots from the pot. Remove as much of the pot as possible, but it is okay if you leave some of the pot pieces clinging to the roots.
Reader Tip: How to Remove Orchid Roots Stuck to Terracotta
To remove roots from terra cotta, just take a razor blade and slide it right under the root and slide it upward close to the pot. I have done it many times, even to remove roots from my walls.
Candy Wert
2- Remove Old Potting Media
Do not reuse any of the old planting media. Always use new media. This will help to prevent the spread of disease. New potting media will also give your orchids a fresh start, without fertilizer salt buildup.
Pick the old planting media from the roots.
Orchids with thin, fine roots are a little more tricky than those with thick roots. It will take a bit more finesse to tease the potting medium out from finely rooted orchids.
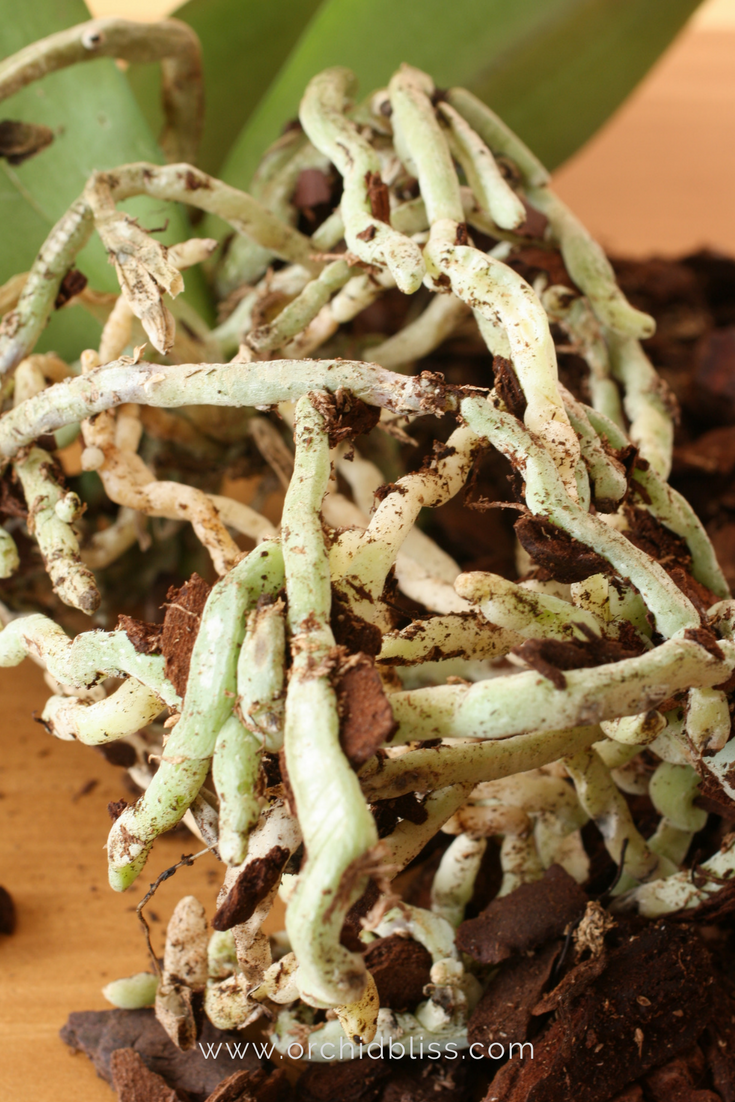
Cut away rot, and remove dead leaves and rotten roots. Inspect the Pseudobulbs, remove old brown lifeless pseudobulbs, and leave green pseudobulbs alone – even if leafless.
Dead roots are easily identifiable because they will be black or mushy. Healthy roots will be white or green and firm.
After picking away old potting media from the roots and trimming away dead roots, rinse the roots using tepid tap water.
3- Divide the Orchid
If the orchid is large enough to be divided, potting is the time to divide your orchids. Sympodial-type orchids are most commonly divided.
Sympodial orchids grow along a rhizome. Additionally, many, but not all, sympodial orchids have water storage in the form of pseudobulbs.
When an orchid grows into a large and healthy specimen with multiple pseudobulbs, the orchid can be divided. Simply break apart pseudobulbs into clumps of 4 or 5 pseudobulbs.
Pot up the clumps separately. You can share and trade your divided orchids. This is a great way to try new orchids and expand your collection.
NOTABLE EXCEPTION: Slipper orchids do not have pseudobulbs, but are sympodial and do grow along a rhizome.
4- Place the Orchid in the Pot
Properly orienting the orchid is important and is based on the growth habit of the orchid.
Before putting the orchid in the pot determine if you have a monopodial or a sympodial orchid. It is important to make this distinction before potting as it will make a difference when potting your orchid.
Here’s why it’s important to know the difference between monopodial and sympodial orchids when potting:
Monopodial orchids will be placed in the center of the pot so that the orchid can continue to grow upwards.
By contrast, sympodial orchids will be placed with the oldest growth placed against the edge of the pot. The new growth will point towards the center of the pot.
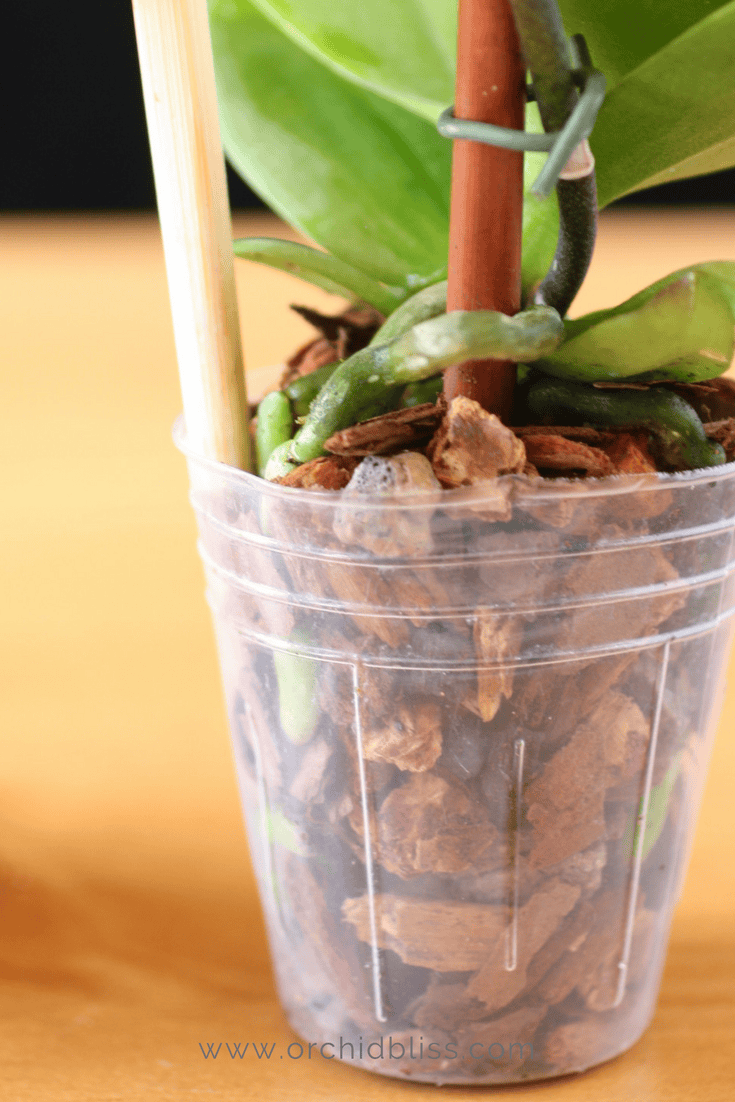
Monopodial Orchids
If you have purchased your orchid from the grocery store, you likely have a Phalaenopsis orchid, also called moth orchid. This type of orchid grows from a single stem. Out of this stem grow the leaves, flower stalk, and roots. Phalaenopsis, Angraceum, and Vanda orchids are examples of monopodial orchids.
When potting, situate monopodial orchids, like the Phalaenopsis, in the center of the pot.

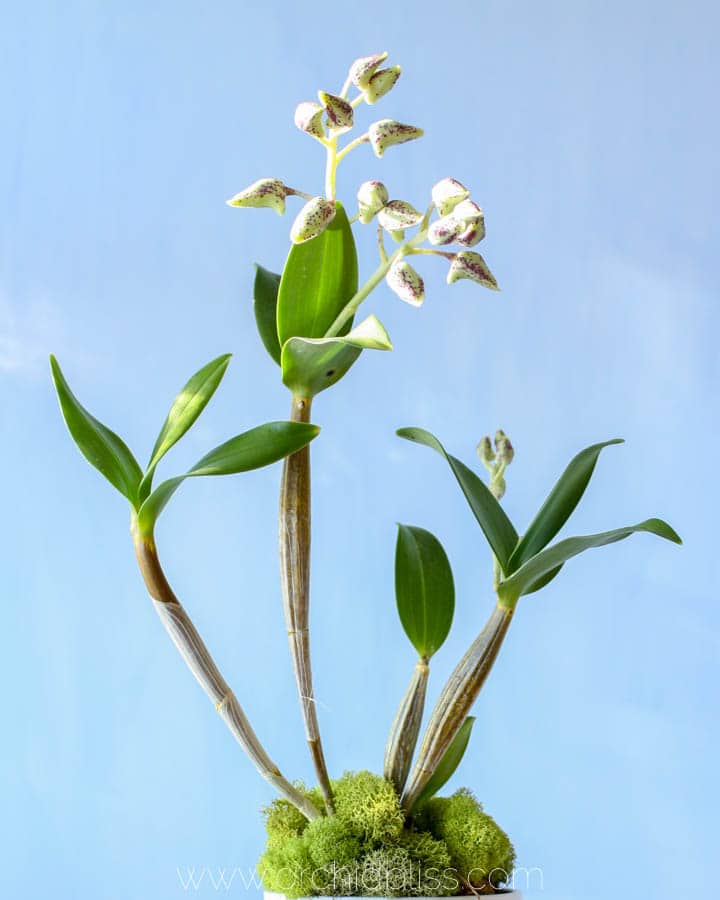
Sympodial Orchids
On the other hand, place sympodial orchids, orchids growing along a horizontal rhizome, so that the oldest growth is against the edge of the pot and the newest growth points towards the center.
You may be wondering how to tell the difference between old and new growth. If you have a healthy plant, newer pseudobulbs should be larger than the oldest pseudobulbs. As the orchid matures, new pseudobulbs will grow larger than the ones grown the previous year until the orchid reaches full maturity.
Another indicator of growth habit is new leaf growth. Paphiopedilums do not have pseudobulbs, but the flower for the next year will always emerge from the newest leaves. Place the newest leaf growth toward the center of the pot and the oldest toward the edge. Over time, the orchid will continue to grow towards the opposite side of the pot.

Young Orchid – Special Potting Notes
Young orchids grow much faster than more mature orchids and will need to be potted more frequently. In these cases, simply gently remove the young orchid out of its pot. There is no need to tease the roots to remove the old potting media.
Add fresh potting mix to the bottom of the new pot and place the slightly larger pot. Taking care not to damage any new growth, fill in the sides of the pot with more potting mix until the crown of the orchid is level with the lip of the pot, and the young orchid fits snugly in the new pot.
5- Work in the Roots and Add Potting Media
Begin working in the roots until the base of the plant is at the top.
After identifying the proper orientation for your orchid, you are ready to begin working in the roots and adding potting media.
- Begin to work the roots into the pot by turning the pot in one direction and turning the plant in the opposite direction. This action encourages the roots to curl into the pot.
- Meanwhile, add more potting media as you go.
- Tamp and pat the pot to remove air voids. Poke a chopstick around to fill in any gaps.
- Continue to tap and gently shake the pot to encourage the potting media to settle into the pot.
- As the crown of the plant prefers to stay dry, it should be just above the planting media. Likewise, aerial roots, those roots that are growing out of the potting media, should also remain in the air and out of the potting media.
Note: Vanda orchids are monopodial orchids and are usually placed in a wood-slatted basket with coarse potting media.
6- Secure the Orchid
After potting, orchid roots tend to push up and lift themselves out of the pot. Not only does this look bad, but the roots at the top will dry out faster than the roots nestled down in the potting mix.
For sympodial orchids, use rhizome clips to secure the orchid to the proper potting heights. To use the clips, one end snaps down on the side of the pot while the long end holds the orchid in place.
In the case of monopodial orchids, as they do not grow rhizomes, just be sure to pot them at the proper level with the base of the stem seated just above the potting media.
7- Update the Label
To finish up, write the potting date on the label and stick it to the bottom of the orchid pot. Never rely on your memory to tell you when you’ve potted. Write it down.
Some Orchids Recover Slowly From Repotting
Take extra care with orchids that don’t like repotting such as the Dendrobium. There are a few precautions you can take:
- Take extra care not to disturb their roots. Just lift the orchid out of the pot – as gently as possible – and set it into a new, larger pot with fresh potting mix.
- For these touchy orchids, it is that much more important to use a premium potting mix so that you don’t need to re-pot as frequently.
- For orchids that grow well in slatted cedar baskets, you can just place the orchid in a larger basket without taking it out of the smaller basket.
Don’t Want to Pot? Mount Your Orchid
Mounting an orchid is a great option for those who really don’t want to pot and re-pot their orchids, particularly if you live in a climate with high humidity. An orchid mount can last for years and years – as long as the mount does not decompose, there is no need to remount the orchid. Another benefit to mounting is that the orchid is grown in its most natural environment.
In short, the presentation of a mounted orchid is simply stunning.
Mounting Materials
- A hardwood slab such as oak, grape, cypress knees, untreated cedar, redwood, or freshwater driftwood
- Do not use walnut, treated wood or saltwater driftwood
- Sphagnum moss – moistened, live sheet moss
- Fishing line – choose one without color
- 16 gauge galvanized wire
Mounting Tools
- Drill
- Pliers
How to Attach an Orchid to the Mount in 5 Steps
- Un-pot your orchid, cleaning and opening up the roots so they can be wrapped around the mount.
- If you would like to hang your mount, drill a small hole on one end and thread the wire through the hole and form a loop from which to hang the mount. If you don’t intend to hang the mount, skip this step.
- To help the orchid transition from the pot to the mount, place the moistened sphagnum moss or live sheet moss on the slab of wood.
- Place the orchid on top of the sphagnum moss or sheet moss, wrapping the roots around the mount. Sympodial orchids should be placed with the oldest pseudobulb at the top of the mount. This way, as the orchid grows, the rhizome will grow downward, and in time, cover the mount.
- Secure the orchid to the mount by wrapping the fishing line around the orchid and the mount. Add extra moss to protect the orchid roots and keep the fishing line from cutting into the roots.
Special Care Requirements for Mounted Orchids
Don’t skimp on humidity if you’re growing mounted orchids. Water vapor – humidity – will help keep the roots from drying out. Aim for humidity levels at a minimum of at least 50%.
Daily misting is a must. Just remember when misting your orchids to mist the roots, not the leaves.
As orchids are intended to live on their mounts for a long time, fertilizer salts will build up. It’s easy to tell when salts are too high because the orchid’s root tips will turn brown. To leach salts, soak the mount in distilled water. When soaking the mount in distilled water, take care that the orchid floats on top.
How to Care for An Orchid After Potting – Or Mounting
For 2 weeks, let the orchid rest/recover, semi-shade, increase humidity, no fertilizer, do not overwater. After 2 weeks, rest is over – return the orchid to its normal growing environment. Feed and water normally.

Freshly potted, this orchid won’t need re-potting for 1-2 years.
To help you further, start by downloading my free cheat sheet to see where to cut the orchid flower spike after blooms have faded to trigger re-blooming. Click here, for the cheat sheet. It’ll be super helpful.
top tools
Here’s a list of the tools I use to pot my orchids:
Ready to Learn More?
Watering Orchids: No More Guesswork
Learn how to water correctly and you'll avoid the #1 cause of orchid death
Read