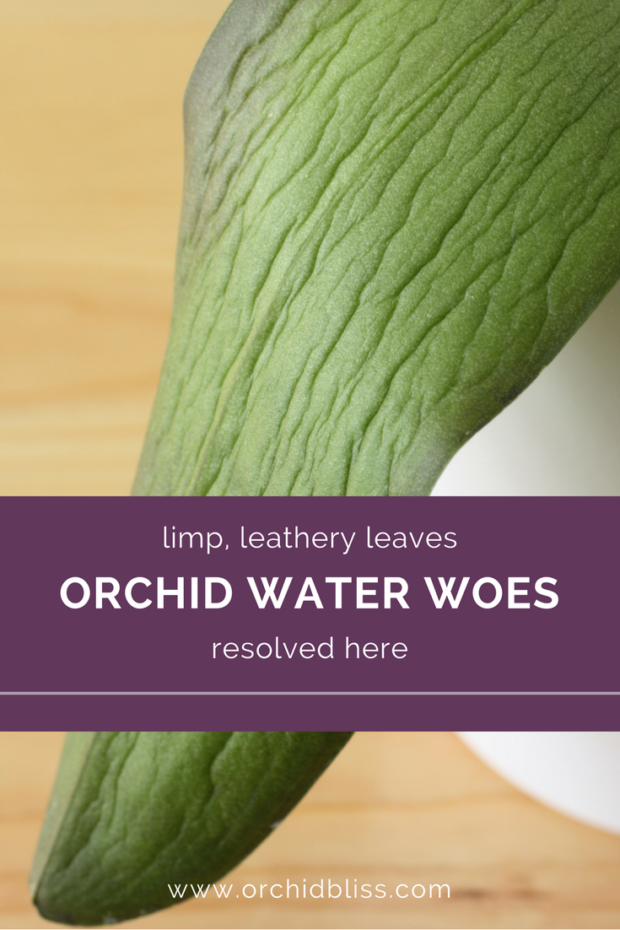
Orchid leaves should be upright, stiff and bright green. If your orchid’s leaves are leathery and limp there is a watering problem.
Interestingly, fixing limp orchid leaves begins by examining the orchid’s roots and then by learning how to correctly water. Both over- and under-watering result in dehydration. And, a dehydrated orchid has limp leaves. The orchid’s roots will tell you if you are over- or under-watering your orchids.
Healthy Orchid Roots | are silvery-green to green or white and are plump and firm with bright green or even magenta tips. |
Over-Watered Orchid Roots | are mushy, limp, stringy black or brown. |
Under-Watered Orchid Roots | are crisp, brown and brittle. |
Once you’ve identified the watering problem, you’re halfway to solving limp orchid leaves. The next step to avoid future problems is to learn how to water so your roots are healthy. Healthy roots mean healthy leaves!
Over-Watering Is the Most Common Cause of Orchid Death
Improper watering often causes a host of problems, resulting in an unhealthy orchid. To avoid these pitfalls, click here to grab your cheat sheet to learn how to grow healthier orchids. It will be super helpful.
Fortunately, overwatering is a fate that can easily be avoided. Because limp, leathery leaves indicate that the orchid is not getting enough water, our first instinct is to water. Then, when the orchid’s leaves are still limp, we water them again, and again. This effectively kills the orchid’s root system.
If the leaves are limp and leathery, make sure that the problem really is neglect. If you’ve been watering and watering, trying to water some life back into your orchid, hold off on the water.
Guess why I know so much about this cycle? That’s right. Guilty as charged. By sad experience, I’ve learned how to ascertain if limp leaves indicate that I’ve overwatered or under watered my orchid. I made that mistake simply because I lacked the knowledge. The orchid’s instruction tag said nothing about watering problems, or about how to solve them. I had to figure it out on my own.
After learning how to spot watering problems, and how to prevent them, my orchids began to flourish. Now my orchids’ leaves are bright and stiff, happy, and thriving.
Some of the links on this page may be affiliate links. Click here to learn more.
First – Are Your Orchids Over or Under Watered?
The first step is to determine if the orchid is in a drought or flood situation. When possible, the best course of action is to lift the plant out of the secondary pot and look through the clear plastic primary pot to inspect the roots. If the orchid is not growing in a clear plastic pot, peek through a drainage hole. Often roots will make their way out of the drainage holes in the pot. If you still can’t see anything, poke your finger into the hole and feel for dampness. If the potting media is damp, wait to water until it has dried out.
Here’s What Under-Watered Orchid Roots Look Like
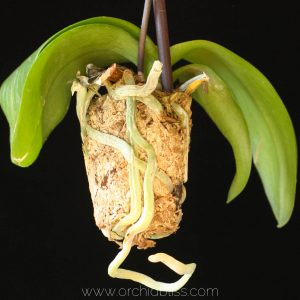
Healthy Phalaenopsis roots are plump and silvery green. Many other orchid varieties have white roots, but they should not be shriveled or brittle. Be sure to inspect the roots that are down in the potting medium, not the ones climbing out of the pot. It is okay if these roots are dry.
If the deeper roots are dried out, your orchid is thirsty. Give your orchid a good soaking. Learning to properly water your orchid is the first step in becoming an orchid expert – and is a skill I’m confident you can acquire.
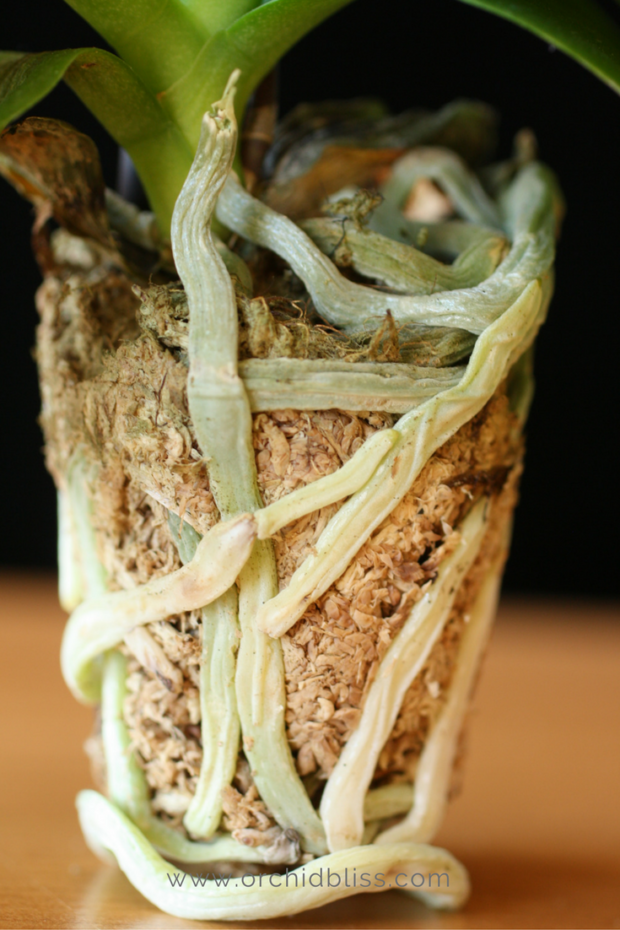
The roots on this Phalaenopsis orchid are dry and ready to be watered.
Here’s What Over-Watered Orchid Roots Look Like
If roots are overwatered they will look like mush and have very little substance. Orchid roots are generally only bright green right after they have been watered and will turn silvery green after a few days. If they are still bright green and you haven’t watered them recently, they may be getting too much water.
Most orchid roots cannot abide wet feet. If they are left in standing water the roots will rot and will no longer be able to deliver water to the rest of the plant. Continuing to water will exacerbate the problem. In this situation snip the rotted roots with a pair of scissors that have been sanitized with rubbing alcohol, and re-pot the plant. If there are very few roots left, raise the humidity level for the plant and wait for the plant to grow more roots. Again, my watering post gives tips on recognizing when to water, and when not to.
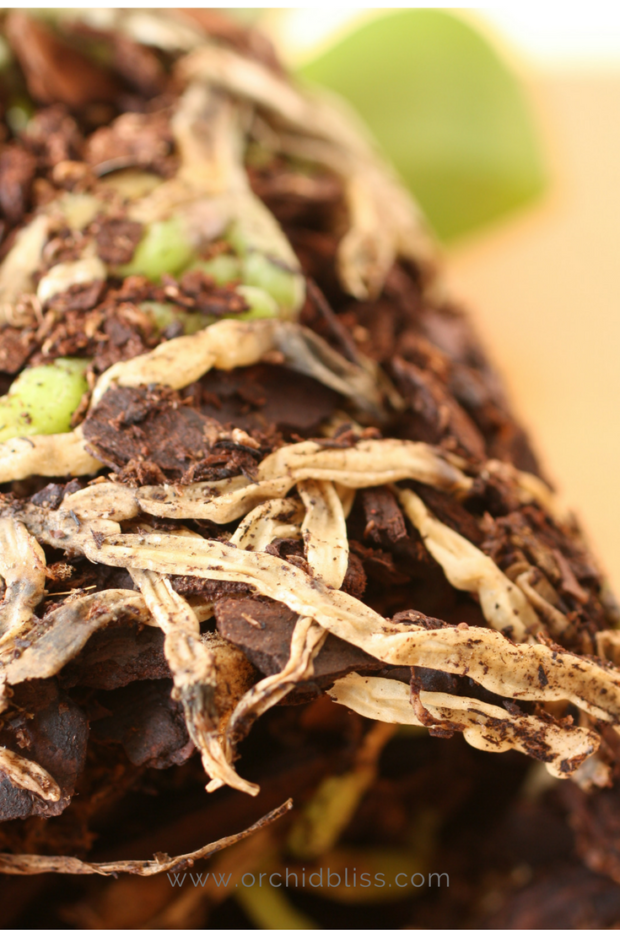
The roots of this orchid are horribly overwatered. They are mushy, limp, and brown.
Second, Discover How to Avoid Future Watering Problems
If your plants are under-watered, simply water your orchid more frequently. Check the potting media regularly to determine if the potting medium had dried out.
If overwatering is the problem, add a few days between watering. Be sure to check the potting medium before watering. If it is still wet, wait to water it. Check again in a few days.
Pictured below are the healthy roots of a cattleya orchid. If your orchid is not a cattleya it will not look exactly like the roots pictured below, but like the roots pictured below, they will be firm, not mushy or dried out.
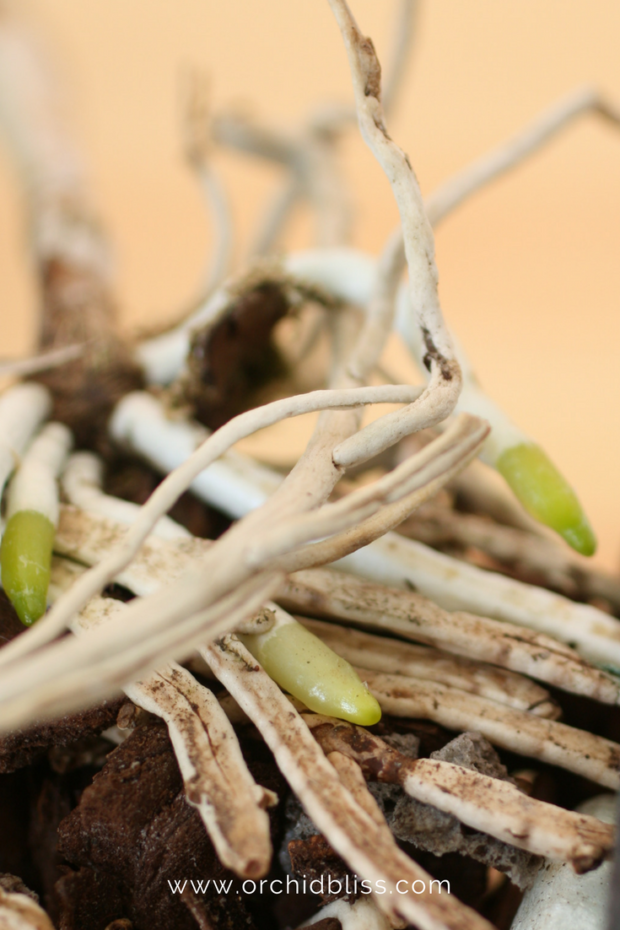
This cattleya orchid’s roots are in great shape. They are white with bright green tips.
Successfully watering orchids is the most important factor in growing healthy orchids. Now that you know what unhealthy and healthy roots look like, you will be able to identify potential problems before they get out of hand. Let the dampness, or dryness, of the plant’s soil, be your guide.
TIP: Don’t let dried out looking aerial roots trick you into thinking you need to water if the potting medium is still wet.
Another Secret to Stiff, Upright Orchid Leaves: Replace the Potting Media
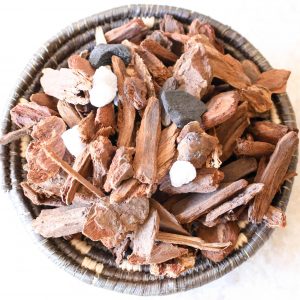
Often the best way to make watering easier is to replace the potting media – that’s code for it’s time to re-pot your orchid. Over time potting media breaks down and becomes compacted and more absorbent. Orchids like a loose, free-draining mix.
Re-potting your orchid may sound like a daunting task, but it’s really not so hard. To learn how to re-pot your orchid, CLICK HERE.
How Orchids are Watered in the Wild
Imagine your orchid growing naturally in the wild. Likely, it is growing on a tree, or even on rocks. In these tropical or semi-tropical climates it will rain copiously, then stop. While it’s raining the orchid roots absorb water. The roots will dry out after it stops raining.
To replicate your orchid’s natural watering cycle, provide your orchid with a high-quality, free-draining potting mix. Then, when watering, water copiously. Afterward, allow the potting mix to almost dry out if you’re growing a phalaenopsis or a paphiopedilum (these orchids do not have pseudobulbs that provide water storage). Other orchids, those with pseudobulbs, like to dry out between watering. As in nature, do not allow your orchid to sit in water.
Again, a high-quality, free-draining orchid potting mix is the best way to prevent over-watering so your orchid will have stiff, upright leaves.
I use and love rePotme Potting Mix. To check out Jack’s potting mix, CLICK HERE.
How to Keep Phalaenopsis Leaves Stiff After Potting
After re-potting phalaenopsis orchids, some phals struggle with potting media that is too free-draining. As a result, the phal becomes dehydrated and the leaves become limp and wrinkly. To keep this from happening, I’ve found that adding a couple of cubes of wool rock to the orchid potting mix keeps the orchid leaves from drooping.
Remember that Phalaenopsis orchids do not have water storage and like their potting mix to be barely damp. At the same time, the mix should be loose and provide oxygen to the roots. Add wool rock to the potting mix after re-potting to keep your Phalaenopsis leaves from drooping.
Limp Leaf Recovery – What to Expect
Now that you’ve fixed the watering problem by determining if you’re over or underwatering, and, if necessary, re-potted, your orchid is on its way to recovery.
Sadly, limp leaves will never become as stiff and upright as they once were. The good news is that as new roots and leaves begin to grow, the orchid will become more and more healthy.
The new leaves will be stiff, firm, and upright – as long as you continue to water your orchid properly and keep an eye on the orchid medium. Replace potting media before it decomposes or becomes saturated in fertilizer salts.
Keep Learning
To help you further, start by downloading my free cheat sheet to see where to cut the orchid flower spike after the blooms have faded to trigger re-blooming. Click here, for the cheat sheet. It’ll be super helpful.

