
Orchids are one of the most ethereal plants to grow at home. With over 25,000 species of orchids, these plants inspire a feeling of awe and ambiguity. Unfortunately, caring for them can be a mystery, but it doesn’t have to be.
Orchids are highly sensitive to root rot. Your plant’s leaves will droop, and flowers may drop off if it’s being affected by root rot. When caught early, an orchid can potentially be saved by removing it from the soil, letting the roots dry out, and repotting the plant in fresh, well-draining soil.
These exquisite plants can be demanding and difficult to care for, especially for inexperienced gardeners. The following article will discuss root rot in orchids and how to fix the problem––if possible. Read on to learn everything you need to know about diagnosing and treating root rot in an orchid.
Some of the links on this page may be affiliate links. Click here to learn more.
Orchid Root Rot Care
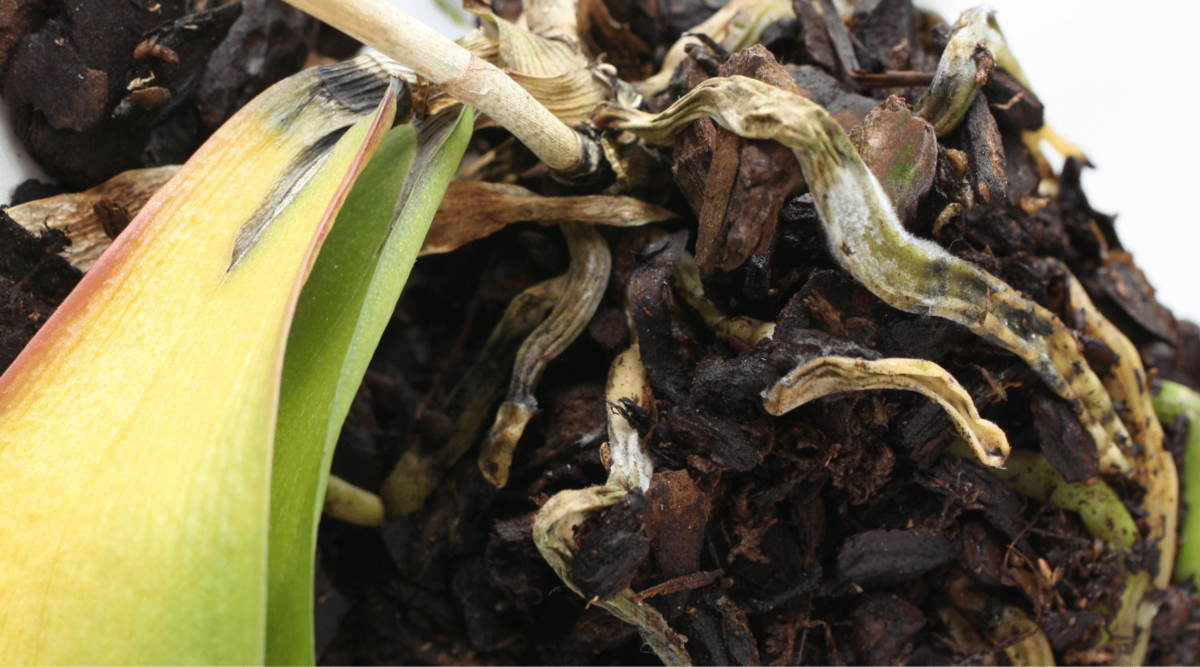
The first thing you should do if you suspect root rot in an orchid is to check the area in question. Gently move some of the potting media away from the plant’s base until you can see the roots. If the roots appear black and feel squishy to the touch, then the roots are definitively rotting. Unfortunately, at this point, it’s highly unlikely that you can save your plant from dying.
However, if the roots aren’t black and squishy, or if only the roots on the outer edge of the root ball are affected, you may still be able to rescue your plant. Follow the steps below to try and rescue your plant from moldy soil.
Discover more about keeping your orchid’s leaves and roots healthy by grabbing your free cheat sheet. Click here to grab your cheat sheet to learn how to grow healthier orchids. It will be super helpful.
Remove Plant From Pot
The first step to remedying an orchid with root rot is to remove the plant from the contaminated potting mix it’s housed in. To do this, take something long and thin, like a chopstick or butter knife. Submerge the tool into the pot, in between the soil and the wall of the pot. Then, run the chopstick all around the edge of the pot, loosening the contact between the soil and the container.
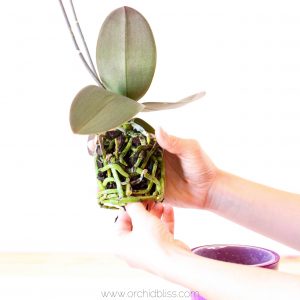
After you’ve loosened the soil, gently tip the plant pot over. Hold the orchid by the base of the stem, firmly yet gently. If the plant is in a plastic pot, squeeze the pot’s sides to gently loosen the dirt from the container. Simultaneously pull the plant out by the base, gradually removing the plant and the soil from the pot.
Gently Pull Away Soil From Roots
Once the plant and dirt are fully removed, set the pot to the side; now, holding the orchid in the air, carefully pull away most of the soil from the root ball. Move the soil to the side and set the orchid down on a clean surface.
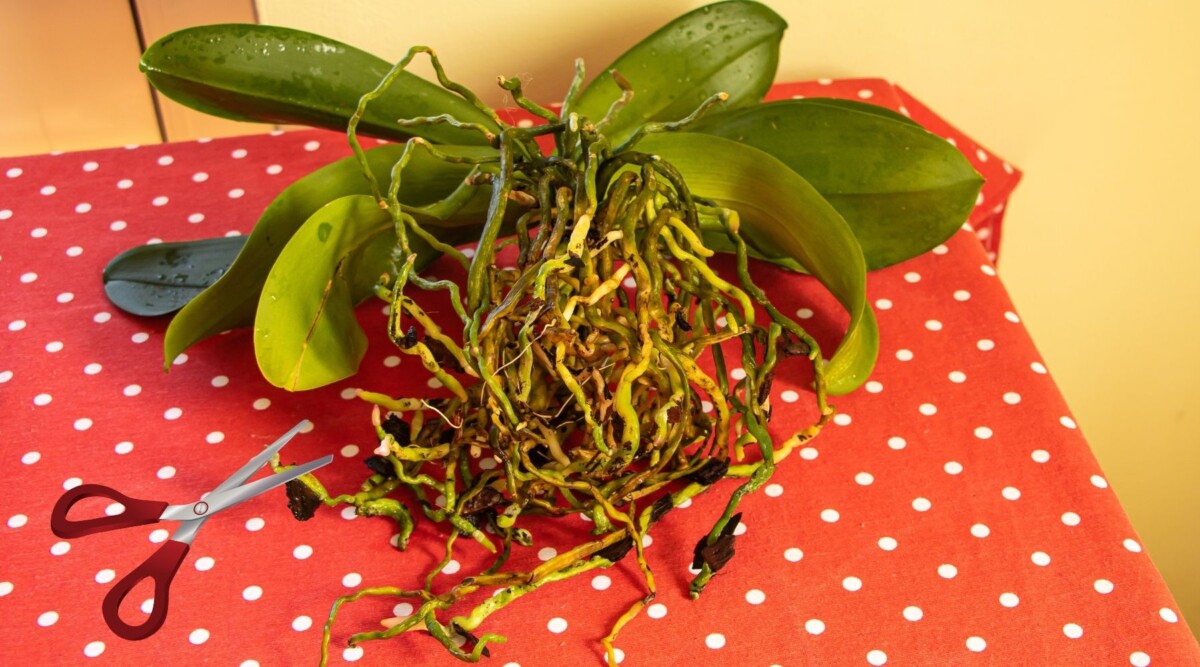
Clean Your Garden Shears or Scissors
Ensure that the tools you are using in this process are disinfected properly. You can use various products to disinfect your gardening tools:
- Household disinfectants (Lysol, dish soap)
- Bleach
- Rubbing alcohol
- Boiling the tools in water
Trim Off Blackened and Mushy Roots
Next, determine which of the roots is unhealthy. Cut off any black roots, extremely soft roots, or parts of the plant which seem compromised. Move these diseased parts onto the discarded soil.
Treat Remaining Roots With Fungicide
To give your orchid the best chance of recovery, treat the plant’s remaining roots with a fungicide. Bonide Liquid Copper Fungicide is an organic product that will help kill the remaining bacteria and mildew not to spread to the fresh pot.
Discard Roots in Garbage
As much as you may want to return the used soil and roots to the earth, putting this contaminated soil into your garden can damage your other plants. Think of your orchid as “sick” and refrain from spreading this cold to your other plants.
Lay Plant Down to Dry
Next, lay out a section of a clean paper towel or newspaper. Lay the orchid down on the paper surface. Gently dab at the remaining roots with an extra paper towel or a clean cloth to dry them as much as possible.
Leave the plant here for 12-24 hours, giving it a chance to dry out.
Select and Disinfect Pot
In the meantime, disinfect the pot that your plant was in. Use any of the cleaning materials listed earlier to ensure the pot is clean and ready for fresh soil. Also, ensure that you’re using the correct size of pot for your plant. Orchids prefer to be snug in their pot, with most orchids satisfied with a 4, 5, or 6-inch pot.
Re-pot Plant in Porous Potting Mix
Line the newly cleaned pot with a porous mix that drains easily. This process will be key to preventing your orchid from falling ill again. Orchids love soil that is airy yet firm. You can buy orchid-specific potting soil if you don’t want to create your potting mix.
These mixes won’t look like traditional potting soil. Instead of “dirt”, orchid potting mixes are open, quick-draining, and composed primarily of fir bark, with a small amount of perlite/sponge rock, and horticulture charcoal. I use and trust rePotme orchid potting mix.
Once you’ve found a properly-sized pot, fill the bottom ⅓ of it with the orchid potting mix, piling some extra mix up around the sides. Place your orchid in the divot that you’ve created. Gently surround the orchid with more potting mix, gradually filling the pot. Once the pot is full, press down upon the soil’s surface to make sure the pot is filled firmly.
Place Your Orchid in Plenty of Light
Orchids enjoy well-lit areas but can be easily scorched by direct sunlight. The best place for an orchid is near a north or east-facing window. South-facing windows will often get too much light, and the hot afternoon sun coming through a west-facing window could burn your orchid.
An orchid would enjoy a frosted bathroom window or sit under a sunny skylight. You can also supplement an orchid’s growth with a plant light.
Follow Proper Watering Practices
The next step in curing your orchid of root rot is to engage in proper watering practices. Orchids enjoy being thoroughly watered so that the potting mix is fully dampened and water runs out of the drainage holes at the bottom.
You should need to water your orchid like this every ten days, maybe every seven at peak growing times. While you may be a bit nervous about soaking your plant fully because of root rot, the fresh, well-draining soil should prevent this from becoming an issue again.
Orchid Root Rot After Repotting
If you have recently repotted your orchid and you’ve since encountered root rot, then it’s very likely the potting mix you used to repot your plant with was not well-draining enough. Over time potting mixes can decompose and absorb fertilizer salts, resulting in an unhealthy potting mix.
Type of Soil
Like those used for the average house plant, traditional potting mixes are often much too dense for orchids. These soils tend to hold large amounts of water, which is good for fast-growing plants that love moisture, like ferns. Orchids, however, are highly sensitive to sitting in water.
While orchids love high humidity (most cultivated varieties are from tropical climates), they also love airflow. Airflow helps to circulate the moisture around the plants and keeps the water from growing harmful bacteria.
As well, in nature, a large number of orchids don’t sit in the soil at all. Epiphytic orchids are a type of non-parasitic flower that grows on the surface of a larger plant. They use very small roots to attach to a tree’s surface, usually anchoring to moss or bark.
These epiphytes then absorb nutrients and moisture from the air. Rainfall, humidity, and air circulation are crucial for these orchids. If you were to bury an epiphytic orchid’s roots in the soil, they would most likely not survive.
Type of Pot
Encountering root rot soon after repotting can usually be blamed on the soil. However, the potting medium is also crucial for your plant’s health.
Almost all house plants benefit from being homed in a pot that has plenty of drainage holes. These gaps allow excess water to leave the soil. With root-rot-prone orchids, these drainage holes are even more vital.
Orchids benefit from a pot that allows for a couple of years of growth but is not too wide. A pot that is too wide can get stagnant in the center. When considering pot size, think in terms of the number of roots. When repotting an orchid, select a pot that is one to two inches wider, not deeper, than the previous pot.
Orchid Placement
Placement of your orchid in your home could also be influencing root rot. As mentioned previously, the ideal place for an orchid is in a bright, warm location. If your orchid is hiding in a shady corner or basement, it’s almost guaranteed to get a disease like root rot.
Warm temperatures and light encourage the orchid to grow, which will force the orchid to use more water. An orchid in a dark room will probably not extract all of the moisture from its soil between waterings. Also, dark, damp rooms tend to be slightly cooler, which will discourage the plant from growing (and drinking).
Lack of Airflow
As with the drainage holes in the chosen pot, airflow is imperative for orchid health. Moving air carries moisture away from the plant’s roots, keeping the roots moist but not stagnant. Depending on your orchid’s pot type and location, it could be lacking the moving air necessary to facilitate growth.
Orchid Root Rot Symptoms
If you’re suspicious that your orchid is suffering from root rot, watch for the following signs:
- Black, squishy roots: The telltale sign of root rot in any plant is darkened squishy roots. Roots that are blackened and mushy have been infected with bacteria and are rotten, to put it simply. These roots are beyond saving and should be removed from the plant as soon as possible.
- Yellowing leaves: Most orchids should have vibrant green leaves protruding from strong stems. Leaves that are yellowing and curling are a sure sign of root rot.
- Droopy leaves: If your orchid’s leaves begin to droop and ultimately fall off, this is usually due to sick roots. At this point, the disease has usually entered the plant’s stem and is very difficult to save.
- New leaves are weak: Touching the leaves of your orchid, they should be firm and strong. New growth, while softer at first, should quickly stiffen up. If the new leaves growing on your orchid are flimsy, they are likely struggling to survive.
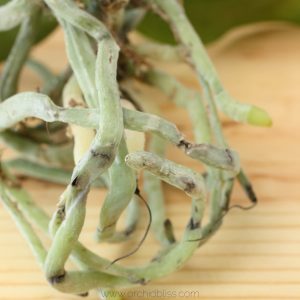
- Brittle or dead roots: Most of the time, you’ll see this disease manifest in black, mushy roots, but sometimes, brittle roots can be a sign of this infection as well. Check the outermost roots of the plant; these are the most likely to die first. Like the human body, a plant will let its outermost limbs shut down first, keeping it’s crucial core alive as long as possible.
- Shedding flower buds: Also known as “bud blast,” a sick orchid may drop its new flower buds before they fully form. Buds may begin to grow, but soon after, they will droop and eventually drop off the plant. This action is a common sign of root rot and signifies other swings in the orchid’s environment and care.
Orchid Root Rot Cinnamon
You can do many things to give a sick orchid the best chance of survival. Using cinnamon is one of them; however, you should never apply cinnamon to orchid roots. While cinnamon may have antimicrobial properties, it is ultimately too drying for an orchid’s roots.
As we’ve learned, orchids love humidity and moisture but hate sitting in water. Cinnamon could help fight the dangerous bacteria in root rot, but if you were to apply the powder to the weakened roots, it would likely dry them out severely and quickly.
When Can You Use Cinnamon?
If you’re dead set on finding another purpose for that aromatic spice in your cupboard, you can use cinnamon to help heal orchids- but keep the application above ground.
For example, if you need to trim the leaves of an orchid due to sunburn or rot, you can apply a very light dusting of cinnamon to the clipped leaf’s edge. This dusting will help the edge dry out the leaf to form a callous and ultimately help guard the plant from airborne infection.
Orchid Root Rot vs. Healthy Roots
Looking at an orchid’s roots for the first time, you may be unsure of what a healthy plant should look like.
An orchid’s roots are a few millimeters thick, larger in diameter than the average house plant. The roots appear similar to miniature tree roots, winding and weaving their way through the airy potting mix.
Aerial Roots
Many of these roots will find their way out of the soil, reaching up into the air. These tendrils are likely searching for a tree branch (or another natural surface) to attach to. While they won’t find it, they will absorb air moisture from the air and are still good for your plant.
Root Color
A healthy orchid has silvery-green or white roots with green tips and to look at, almost seems dry. These roots will often turn bright green after watering but should return to whitish-green within a few days. If the roots remain deep green, that is your first sign of impending trouble.
An orchid about to experience root rot will often have dark green roots for a few weeks before the actual sickness occurs. The green color will deepen further and eventually turn dark brown or black.
Become familiar with your orchid’s roots and what color they generally stay.
Root Color | Meaning |
White or whitsh-green | Healthy roots, ready for a drink |
Bright green | Watered roots, not ready for a drink |
Dark green | Borderline sick roots, move to a brighter location and increase airflow if possible |
Brown | Sick roots, need to be removed ASAP |
Black | Dead roots, remove and repot plant ASAP |
Brittle Roots
Root rot is the most common disease in house-bound orchids, but it isn’t the only one. If your plant’s roots are extremely brittle and snap or crumble when touched, then your plant is severely underwatered. Give this plant a big drink immediately, and spritz the roots regularly over the next week, followed by another full watering. You may be able to save the orchid if you act fast!
Summary
Orchids are elegant flowers to give as a gift, whether to yourself or a friend. However, they are a gift that requires commitment and dedication. Orchids should not be bought unless you are prepared to give them the light, humidity, and airflow they need. If you properly take care of your orchid, they will reward you with beautiful, long-lasting blooms. Should your orchid fall ill because of root rot, follow the directions in the guide, and you’ll have a chance to save it!
Related articles
EVERYTHING YOU NEED TO KNOW TO REPOT AN ORCHID
For optimum health, repot your orchid every 1-2 years. Come learn how.
Read
Why Re-Pot Orchids – Plus 4 Clues that Tell You When to RePot Orchids
Pottting at the right time vastly improves how well your orchid will adapt.
Read
Sources
- Science Mag: Orchids’ Dazzling Diversity Explained
- University of Florida: Disinfecting Your Garden Tools
- RepotMe: Is Your Orchid Over Watered or Over Potted
- AOS: Orchid Potting Media Reviewed
- American Orchid Society: The Importance of Humidity and Air Movement in Successful Orchid Culture
- Orchid Plant Care: Is Your Orchid an Epiphyte
- Gardening Know-How: Types of Pots for Orchids
- NCBI: Antibacterial Effects of Cinnamon: From Farm to Food, Cosmetic and Pharmaceutical Industries
